
In 1984 Apple Computer released the fourth computer to its Apple II line, the Apple IIc, A2M4000. The Apple IIc was a "compact" version of the Apple IIe with many expansions built-in. It was released alongside the Macintosh and despite the hype the market did not respond in the way Apple had hoped. Nonetheless they still sold about 400,000 systems from 1984-1988. In 2023 these systems can still be purchased for $150-200, so let's take a look to see what makes them special.
Features
The IIc is an all-in-one computer like its predessors, but unlike them it allows for far more functionality out of the box. When you bought an Apple II, II+ or IIe, all you got was the system with its built-in keyboard, a power cord and manuals. The internal expansion slots were all empty. Disk drives, printers, modems and and the interface cards to interface them with the computer were an additional purchase. (Two exceptions: the IIe Platinum came with an extended 80-column card and the II and II+ came with hand controllers). You could use the cassette ports for loading and saving programs with your own cassette deck, but that had fallen out of fashion very quickly after 1980.
The IIc packed in a lot for $1,295 compared to the $1,395 that was required to buy a IIe. Apple knew which expansions were popular and hoped would be popular, so they included a pair of serial ports, a mouse interface accessible via the gameport, a more advanced disk controller, a 5.25" disk drive built in with support for an additional external disk drive, a special video port for an LCD display and 128KiB of memory supporting double high resolution graphics and 80-column text modes. The IIc also has a headphone jack and a volume wheel for the internal speaker and has firmware support for the Dvorak-keyboard layout (enabled via the "keyboard" switch). It uses a 65C02 CPU with added instructions and addressing modes compared to the 6502 found in the previous Apple II computers.
In order to fit all those features, a few others had to be dropped that were present in the IIe. The cassette in and out ports were not often used by 1984 and were dropped. There is no header for a numeric keypad as there is on the IIe or 16-pin Game I/O socket. This officially limited you to the one joystick supported by the 9-pin D-shell Mouse/Game Port. Most importantly, there were no general-purpose expansion slots in the IIc, what you saw on the outside is what you got. Considering that building a IIe with the equivalent functionality would probably set you back double the price of the IIc, you were paying a lot for the luxury of choice with the IIe.
Other than these goodies, the IIc provided the rest of the mainline Apple II experience. The color was still generated via NTSC artifact color, Applesoft BASIC was in ROM, 5.25" single-sided disks with a capacity of 143KiB were the standard storage media, the same 62-key keyboard as the Apple IIe was present and the system supported an analog joystick with two buttons.
Portability
The IIc has a handle which made it easy to transport. The handle also doubles as a height adjustment, by folding the handle down the system's typing angle can be increased as it rests partially on the handle. In some documents Apple did not recommend using the computer without the handle propping it up due to the desk or other surface underneath blocking the bottom cooling vents, but in the standard manual the handle was intended for the option to raise the keyboard and increase the typing angle.
While relatively small and light, the IIc could not work without an external display. Apple sold the Monitor IIc and Monitor IIc Stand to provide for a relatively small and transportable display that could be setup over the system with relatively little space required. The Monitor IIc is a 9' green monochrome display that supports composite video input. The separately-sold Stand is designed to support the Monitor IIc above the IIc.
The Monitor IIc is an extraordinary display for its size. It displays very sharp 40-column text and quite readable 80-column text. The display takes about 10 seconds to warm up and display video. The phosphors are slow-decaying phosphors not unlike the IBM 5151 display, but they are not quite as slow. There are externally adjustable controls for brightness, contrast, vertical size and vertical hold. It comes with a standard 3-pin power cable and an RCA composite video cable.
As a monochrome composite video display, this monitor is not limited to displaying Apple II video, it can display video from any composite source. Color composite video will display not as solid shades but with "chroma dot" patterns. Composite color video overlays a chroma signal onto a luma signal, so a monochrome display that does not filter out the chroma signal will interpret it as part of the luma signal. It can handle 50Hz signals, sometimes without even needing to adjust the vertical hold control. If you want to watch some 1960s Doctor Who in the PAL format for example, this monitor will prove a very interesting experience. Horizontal and vertical centering adjustments require turning the rings on the CRT neck, so if you do this then take a picture of their default position beforehand so you can restore them to their Apple II positions.
The Stand provided a tilt adjustment by the knob on either side. The load bearing "c" portion of the stand and the knobs are made of metal. There is a thick plastic piece in between the knobs into which the Monitor IIc is mounted with a flat-head screw. You can lay the Monitor II flat on a desk or on another stand, but unlike most stands of the 1980s the Monitor II Stand is most likely to have been preserved as it is attached to the Monitor IIc.
In terms of portability, the Apple IIc requires a unique external power supply which is marked as the Power Supply IIc. The supply provides output of 15VDC at 1.2A and not only has the shape of a brick but weighs as much as one too. The US supply is 120Hz AC, so it is not ideally suited for international travel. The adapter which plugs into the IIc is a 7-pin circular female DIN connector. The specs for the supply are not uncommon, so if you had a IIc system without the Power Supply you could construct a substitute. The pinout for the connector is found in the Apple IIc Reference Manual Volume 1 at page 207.
As a portable computer, the Apple IIc is not the most convenient even by mid-1980s standards. You could carry three pieces. the IIc, its Power Supply and the Monitor IIc and Stand. Apple sold a carrying case with room for the IIc and its Power Supply, but not the Monitor IIc and its Stand. The IIc and the Monitor IIc require separate AC sockets for their cables.
For portable use Apple offered the IIc Flat Panel Display for sale. The Flat Panel Display was thin enough to be mounted directly onto the IIc, used monochrome LCD technology and did not require a separate power cord. The Display is not backlit, was hard to see with poor contract and stretched out text and graphics to accommodate its wide screen screen aspect ratio. It sold extremely poorly and is very difficult to find today.
Using the IIc
If you buy a IIc, the first thing you probably would want to do is to run some software on it. The most basic way to do this is if you have no original Apple II disks to use ADTPro to write disk images back to disks using the IIc's built-in disk drive. The IIc uses 5-pin DIN connectors for its serial ports, PCs use 9-pin D-shell connectors, so you will need a converter cable like this one or make your own adapters if you wish to connect to connect to non-Apple peripherals. You will also probably need either a PC with a serial port built in or a USB to Serial Port adapter. Apple envisioned the ports being used for a serial printer and a modem and they are set by default for those purposes. If you wish to reconfigure the serial port, you use software with the provided system utility disk. An Super Serial Card in a II, II+ or IIe requires changing jumpers on switch block to configure the serial ports.
The first IIc mainboard revision has serial timing not quite correct to the RS-232 standard. As a result modem communications above 300 baud are likely going to fail. ADTPro does not seem to have an issue with these mainboards as it relies on bit-banging the serial port instead of timing dictated by its ordinary operation.. If you see a 1.8432MHz crystal oscillator near the top right corner of the power supply, you have a fixed mainboard with proper serial port timing.
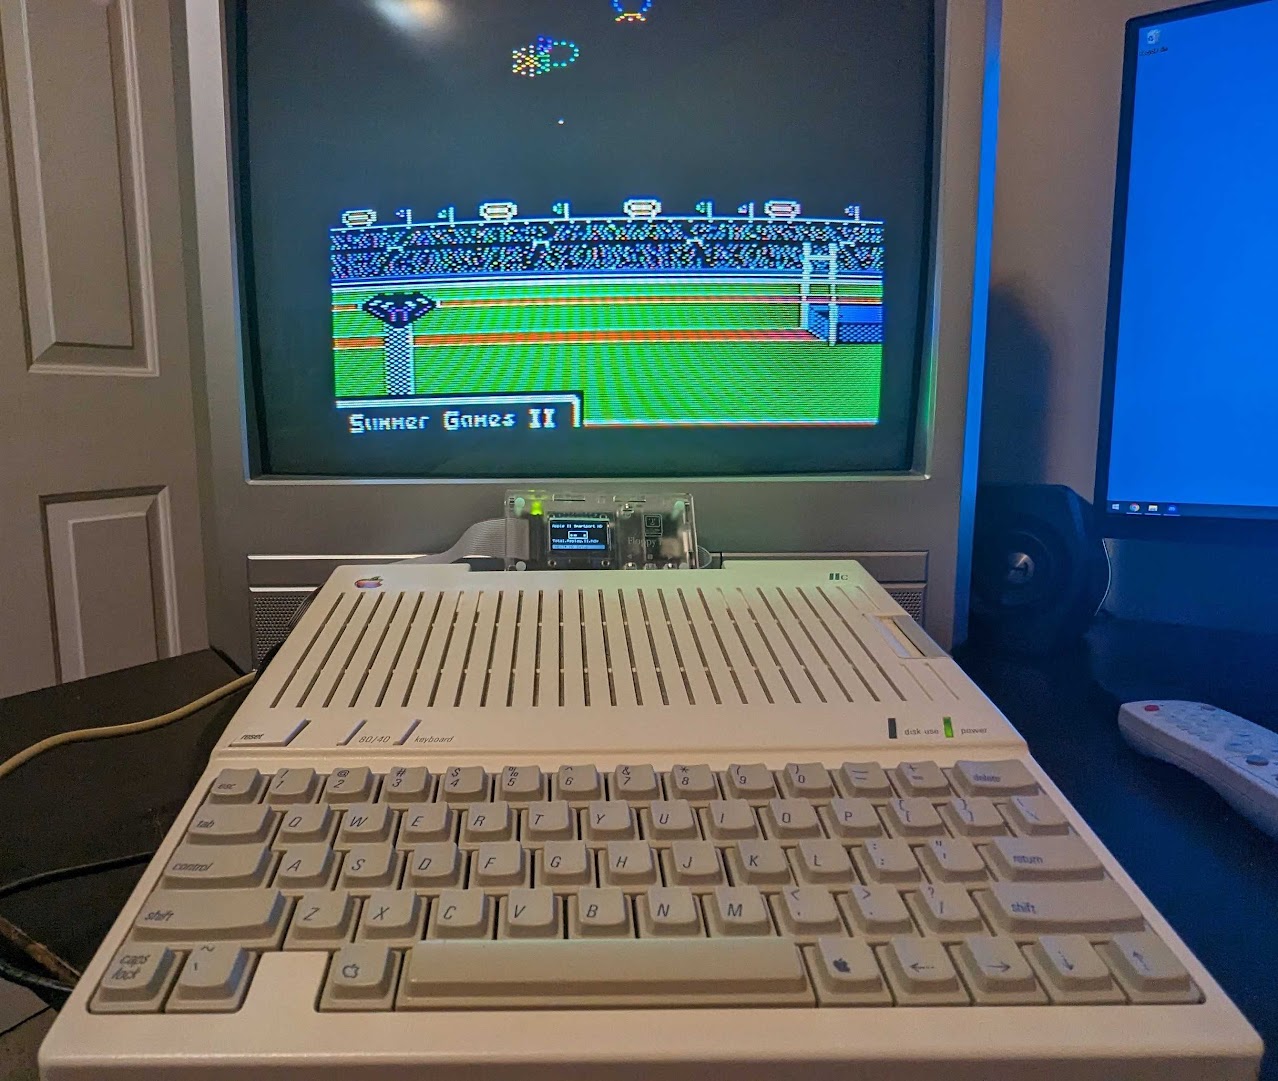
If you wish to go beyond physical floppy disks, you can use wDrive or Floppy Emu external disk drive emulators. The internal disk drive is set to be the boot drive (Drive 1). The Disk IIc (A2M4050) is set to be Drive 2. Most programs insist on being booted off of Drive 1, not Drive 2. You can plug in the ribbon cable and header from a wDrive or Floppy Emu into the IIc's mainboard and use the emulator externally by running the ribbon cable out of the back of the machine. You can do this and keep the rear enclosure panel on. The IIc can power both a wDrive and a Floppy Emu at the same time with one being the "internal drive" and the other being the "external drive." Big Mess 'o Wires, the creator of the Floppy Emu sells an adapter which allows you to switch the assignment of the internal and external drive for boot purposes as well as to allow you to use the Floppy Emu's dual floppy emulation mode.
The external monitor port is used not only for the Flat Panel Display but also for the IIc RF Modulator. The IIc Modulator will encode both audio and video into an RF output signal. PAL IIcs exist but only display monochrome video as they come out of the box. In order to display PAL color video you will need the Apple IIc PAL Modulator/Adapter A2M4023 or something that works like it. The PAL adapter has both RF and composite video output. You can make an adapter for the RGB2HDMI to extract digital video data for the device to sample and upscale. The only real "benefit" of this method versus tapping the composite video output with the analog board attachment is that you can eliminate artifact color from the text rows of the mixed text & graphics modes. Every Apple II which output a natively generated composite video signal could not do this, the only Apple products which could were the Apple IIgs and Apple IIe Emulation Card for Macintosh.
The Apple IIe had a Mouse Interface Expansion Card which allowed you to plug in a mouse without having to remove your joystick. The Apple IIc does not have this luxury. Some Apple M0100 Mice work with the IIc but not all do without some help. The Apple Mouse IIc, A2M4015 and A2M4035 are the mice that are designed to work with the IIc. Like the M0100, the Apple Mouse IIe A2M2070 may or may not work with the IIc's mouse port.
Opening the IIc
Opening any member of the Apple II computer family is trivial, except for the IIc and IIc+. The other systems, from the Apple II to the Apple IIgs, invited users to open them in order to install upgrade cards. The IIc was not intended to be user upgradeable, so its mainboard is hidden by metal screws and plastic clips.
The Apple IIc's enclosure consists of three plastic pieces, the top, the bottom and the rear. In order to get inside the IIc, you will need to unscrew six screws from the bottom of the shell. The screws near the handle are larger than the screws surrounding the keyboard, so you will need a larger screwdriver for those. Do not unscrew the four screws in a rectangle pattern just below the handle screws just yet, these hold the disk drive in.
In addition to the six screws, there are three clips holding the top half of the enclosure to the bottom half. The rear portion of the enclosure is held to the to top portion by seven clips and to the bottom portion by a clip on each side. You should use a plastic spudger to reduce the risk of damaging the plastic. Some people suggest dropping your Apple IIc from a short height to dislodge the clips, but that might not do nice things to the internal disk drive, which relies on calibrated moving parts. If your computer has yellowed there is a good chance one or more of the small clips will break off when the system is first opened.
My advice is to start at the front of the keyboard and work out that clip first (below the N key), then work to right where there is a clip on each side of the disk drive. From there work the clips that hold the rear panel to the side/bottom piece. I would focus on the clips on either side of the rear piece and try to remove the top and rear piece as one. After the first time opening the system, subsequent openings will be much easier.
Once you get top enclosure removed, you can access the keyboard, disk drive, power supply and finally the mainboard. Remove the keyboard first, as it slots into the disk drive's cage for support. It is only connected by a ribbon cable. The disk drive is attached to the mainboard by a short 20-pin ribbon cable, remove it and then unscrew the drive from the underside of the system. The internal portion of the power supply is inside the metal box to the left of the disk drive and is connected via a card edge connector. The internal power supply is held in place by a pair of screws and a circular adhesive pad underneath the shield. Remove the screws then carefully work the power supply from the card slot. If you need to remove the mainboard from the bottom shell, there are several small screws around the board securing it to the shell to remove. Once removed, lift the board from the right side as you will need to work to clear a post near the the headphone jack on the left side.

ROM Revisions and Smartport
The original ROM version (ROM 255) for the IIc is less capable than its successors. It has something like a self-test accessible when turning on the system and holding down the Open and Closed Apple keys (or with the keyboard detached from the mainboard port), but the testing will never end and does not report on the status of the system. It can boot from the external drive (Drive 2) by entering the command PR#7 at the BASIC prompt, but most programs insist on booting from Drive 1.
The normal Apple IIc boot process is that the system will first look to boot from the internal drive and then from a Smartport device. If you wish to boot from a Smartport device, the internal drive must be connected.
The firmware ROM is socketed and uses an EPROM-friendly pinout, so it can be upgraded. You can enter the command PRINT PEEK (64447) at the BASIC prompt to determine the version of the ROM in your system. The system will return either 255 (oldest), 0, 1, 3, 4 or 5. You can upgrade your ROM version from ROM 255 to a later version with these instructions.
The second ROM version (ROM 0) added support for the UniDisk 3.5 Drive (A2M2053) and other Smartport devices. The UniDisk drive is a double sided drive and can hold up to 800KiB but the Smartport firmware supports volume sizes up to 32MiB. The disk drive controller in the Apple IIc is capable of handling the UniDisk without any other circuitry. The Apple IIe requires a special floppy controller interface card to use the UniDisk, the Disk II Interface Card will not support a UniDisk drive. The IIc does not support the Apple 3.5 Drive (A9M0106), you need the faster IIc+ for that. You can daisy chain the UniDisk 3.5 Drive with either the Disk IIc Drive or a second UniDisk 3.5 Drive.
The third (ROM 3) and fourth (ROM 4) versions were intended for the Memory Expansion IIc, the A2M4100. The Memory Expansion IIc differs from the original IIc in two respects. First, the RAM in the system can be upgraded to 1MiB via an internal expansion port. Second, the keyboard of the Memory Expansion IIc is much improved over the IIc's original keyboard. The fifth and final ROM version is found on the Apple IIc+, A2S4500.
Keyboard
If the Apple IIc has an Achilles Heel, it is the keyboard. From 1984-1986 Apple used a keyboard with its own keyswitch design, known to history as the Apple Hairpin Spring keyswitch. This keyboard switch is garbage, easily one of the worst Apple designs released prior to 1998. The keystem presses against a pair of springy metal plates which make contact. The hairpin which surrounds the keystem on three sides buckles and provides a tactile click.
The first problem with these keyboards is that there is an anti-contamination mat with holes for each keystem that will have become warped and brittle with age, interfering with the action of the keystem. It should be removed, it is no longer doing its job and it never was much good at doing it anyway. Keep the rubber mat that is fused to the PCB.
The second problem is with the hairpins. These hairpins are small and thin pieces of metal. While they can be removed easily with just a pair of tweezers, they can get lost easily if dropped on the ground. They also in many cases from usage or age have been bent too wide, making the key unclicky, or too narrow, making the key press too crunchy. The resulting feel is very uneven. You can try to bend them back but you will find the feel likely very inconsistent regardless of what you do. Getting the hairpins back into the key switch is a bit fiddly.
If you want a linear keyboard you can remove the hairpins, but that leads me to the third problem, uneven wear on the keys. The spring plates underneath the key stems do not wear evenly. This leads to keys where the lightest press can activate them whereas the next key over requires significant force to activate. Double key presses are not uncommon.
Three of these keys do not use the standard Hairpin Spring switches because they are latched switches. These latch switches are awful too, they get stuck down and get unstuck only after some serious massaging. Fortunately two of the switches, the 80/40 column and the Dvorak switches, are useless. Programs decide for themselves for the most part whether to use 80-column or 40-column text, they don't care about the state of the IIc's switch. The Dvorak switch allows the keyboard to change into a Dvorak-friendly layout, but you have to rearrange the keys with a chip puller. Apple II programs were generally designed for the QWERTY layout, with I, J, K, M being a popular layout for movement before the IIe, a Dvorak layout will be inconvenient at best for many programs. The Caps Lock key is more useful, especially if you want to use lower-case text, but BASIC and many programs will insist on upper-case input.
The good news is that the Apple IIc Memory Expansion uses Alps SKCM Amber/Taxi Yellow switches and the IIc+ uses Alps SKCM orange switches. Both are clicky switches and have a far more durable design than the Hairpins. The Amber switches are unique to the Memory Expansion IIc's keyboard but the Orange switches can be found on many of the keyboards Apple sold in the late 80s to early 90s. There are some late non-Memory Expansion IIcs with the Alps switch keyboard, so you may get lucky.
MacEffects conducted a successful Kickstarter this year for a replacement mechanical backlit keyboard that utilizes the old keycaps of the IIc. Keyboards will be produced by the end of the year. I was unable to back the Kickstarter because I did not have a IIc at the time but if they have any leftover I hope to buy one. I have watched reviews for their replacement IIe Mechanical Keyboard and they were positive. My IIe's existing keyboard is tolerable to type on (if a bit stiff and at an uncomfortable angle), unlike the IIc's, but a keyboard with new and modern keyswitches is a game-changer.
Sound
Only the IIc and IIgs have headphone jacks, the other systems (including the IIc+) only support output to the internal speaker. For the regular Apple II speaker, you can do no better than the Apple IIc's. It can get quite loud but the volume control can make it quieter or turn it off. The audio output from the headphone jack is excellent and reasonably reflects the sound from the built-in internal speaker. The only other good method to record audio from an Apple Speaker is the alligator clip method or its equivalent.
The official solution for a sound card for the Apple IIc were external devices like the Mockingboard D or the Apple Cricket. These devices connect via the IIc's serial ports and software must specifically support them. Only four titles are known to do so, but that is not the end of the story because Korean Apple II designer Ian Kim made the Mockingboard 4c back in 2017 and still sells it from time to time. (He also designed the Mockingboard 4c+ for the IIc+.) The Mockingboard adds a pair of AY-3-8913 sound chips for stereo support.
The Mockingboard 4c is an internal upgrade board that fits into the IIc's CPU socket, giving the upgrade full access to the 65C02's bus like typical Mockingboard. If your keyboard has a brace, it must be removed or have some of its plastic cut so the upgrade board has clearance to fit underneath the keyboard. The upgrade comes with its own pair of speakers for stereo audio. You can solder a wire to the hybrid IC near the IIc's volume wheel to control the audio output of the Mockingboard 4c but this is not required if you are content with the default audio output. You can also bypass the board's amplifier and drive a pair of external speakers, you will need your own wiring harness for this.
Unfortunately the Mockingboard was designed to be used in Slot 4 and most Mockingboard-supporting programs expect it to be in Slot 4. This is not typically a problem with an Apple II+ or an Apple IIe, but an Apple IIc puts the firmware for the mouse in the addresses used by Slot 4. As the IIc was the first Apple II to support a mouse, most programs expect the mouse to be in Slot 4. Some programs require the Mockingboard 4c to be turned on manually by entering the command at either the BASIC prompt or the Machine Language Monitor prompt, then booting the game. Ultima 4 and Zaxxon require patched disks to run with the Mockingboard 4c. One user complained that Prince of Persia would no longer run with the Mockingboard 4c installed.
Joystick Adapter Fix for IIc
The combined joystick/mouse port of the IIc gives you issues that will not be found with dedicated joystick and game I/O ports of the other IIs. Back in 2020 when I bought my Apple IIe I also bought an IBM 15pin to Apple 9pin Joystick Adapter v1.2 from ReactiveMicro. I was pleased with the converter as I used it with the Apple IIe but had issues when it came to the Apple IIc. The adapter showed the joystick axes moving, but the buttons did not register. I tried the Apple IIe/IIc Diagnostics v2.1, MECC's Computer Inspector and several games but the buttons did not register as being pressed. I wired up an adapter to convert the Berg connector of an IBM PCjr. joystick and the buttons on that stick worked perfectly, so I knew the port worked.
I reached out to ReactiveMicro to see if they had any ideas or advice and the owner, Henry Courbis quickly got back to me. He stated that they had issues with the design with the IIc and the resistors at R3 and R4 were too high at 680 ohms and should be 100 ohms. He offered to send me a fixed adapter or the correct resistors. I asked for the replacement resistors and he sent a few 100 ohms. They were SMD resistors but the soldering was pretty easy as the board is not complex. I found that 100 ohms was good for the Button 0 resistor but I needed 200 ohms for Button 1, so I wired a pair of 100s in series. With 100 ohm resistance the joystick axis would invert if Button 1 was pressed, fortunately the issue went away with 200 ohms.
Other Issues
The 128KiB built into the Apple IIc comes on sixteen 64K x 1 4164-type, 150ns chips. Many Apple IIcs, especially the older units, use "MT RAM" with an Apple logo on it. These DRAM chips tend to be significantly less reliable for whatever reason than other brands of DRAM chips. You may have to end up replacing these chips at some point. Apple IIes will often have the same issue, but the mainboard DRAM chips may be socketed.
The Apple IIc contains several custom chips, the MMU, the IOU, the IWM, the TMG and the GLU. The MMU and IOU may be able to be sourced from an Apple IIe with a DHGR-capable mainboard, the IWM from another Apple IIc or early Macintosh. The GLU is a pre-programmed GAL and a replacement can be found at ReactiveMicro. If you need to replace the 65C02 look for one from NCR, Synertek or Rockwell. A 65SC02 may not work.
Apple IIc - Epitome of the Apple II Experience? what about the 2gs?
ReplyDeleteThe IIc is not as all-encompassing as the IIgs of course, but as a concise example of how an Apple II was used, it is an epitome of its popularity.
DeleteThis takes me back to high school! In the mid 80s the Vienna International School had a computer lab with IIe’s and IIc’s, the latter with colour monitors. I spent many fun hours there after school, learning tons!
ReplyDeleteApple IIc - Epitome of the Apple II Experience? what about TRACKSTAR E and f “Trackstore” floppy disk images, and ProDOS virtual hard drives? also
ReplyDeleteLaser 128
ProDOS virtual hard drives are supported via Smartport, Trackstar and Laser 128 are third party products.
Deleteyour title is Apple IIc - Epitome of the Apple II Experience?
DeleteTrackstar and Laser 128 are third party products but offer the Apple II Experience. Trackstar iirc ran faster than the 2c