Friday, October 31, 2014

NES (and Famicom) Lists

I have felt list-happy over the past few days, and decided to put together some lists of NES games.

Official Licensed Multi-carts

Donkey Kong Classics
Super Mario Bros/Duck Hunt
Super Mario Bros/Duck Hunt/World Class Track Meet (US Only)
Super Spike V'Ball / Nintendo World Cup (US Only)
Sesame Street ABC & 123 (US Only)
Super Mario Bros. / Tetris / Nintendo World Cup (Europe Only)

My definition of a true multi-cart is that the games on it had to have been previously released as standalone cartridges.  All the above carts fit the criteria.  A game like Short Order/Eggsplode does not because the two halves were never released separately.  Unfortunately, Donkey Kong Classics does not contain the "pie factory" level.  Nintendo would, however, include it with Donkey Kong Original Edition released for the European Nintendo Wii and later the 3DS.  The ROM extracted from the Wii is fully playable on a CNROM board that has been modified to prevent bus conflicts.    

All these multi-carts, except for Donkey Kong Classics and Sesame Street ABC & 123, were only released as pack-in games with the NES console.  Super Mario Bros/Duck Hunt was released with the Action Set and included a NES Zapper.  Super Mario Bros/Duck Hunt/World Class Track Meet was released with the Power Set with a NES Zapper and Power Pad.  Super Spike V'Ball / Nintendo World Cup was released with the Sports Set, an NES Satellite and four controllers.  Interestingly, World Class Track Meet, Super Spike V'Ball and Nintendo World Cup were not developed by Nintendo but by Bandai and Technos.   

Super Mario Bros. / Tetris / Nintendo World Cup could be found in the Super Set released in Europe both for PAL-A (Mattel Version or NES Version, released in the U.K., Italy and Australia) and PAL-B (France, Germany, European Economic Community, Scandinavia) countries.  

Re-releases

Stadium Events/World Class Track Meet
Mike Tyson's Punch Out!!/Punch-Out!!
Pac-Man (Tengen)/Pac-Man (Tengen Unlicensed)/Pac-Man (Namco)
Gauntlet/Gauntlet (Unlicensed)
R.B.I. Baseball/R.B.I. Baseball (Unlicensed)
Indiana Jones and the Temple of Doom/Indiana Jones and the Temple of Doom (Unlicensed)
Mario Bros. (Europe Only) 

These cartridges have some substantial change when re-released.  Stadium Events was briefly released by Bandai with the Power Pad, but saw far, far more widespread distribution as World Class Track Meet.  The Stadium Events US cartridge is insanely rare, but WCTM is the same game with a different box, label, manual and title screen.  

Pac-Man is unique in that it was released three separate times.  The original Famicom cart was from Namcot.  In the US, first Tengen released it when they were an official licensed NES publisher.  Then they released it in their own-style of cartridge casing when they went down the unlicensed road.  Finally, late in the NES's life Namco released it for the third time, as a licensed cart.  The Namco version is easily the rarest.  Each version has different copyright text.  Similarly, Gauntlet and R.B.I. Baseball were released twice, once as a licensed cart and the second time as an unlicensed Tengen cart.  Weirdly, Indiana Jones may have been released first as a Tengen unlicensed cart, and then by Mindscape as a licensed cart.  

Punch-Out!! was released around August of 1990 and revised to eliminate Mike Tyson's name and likeness in game when their licensing contract with him expired.  He had received his first professional defeat and lost the heavyweight title back in February of 1990 to James "Buster" Douglas.  Even if he did not, as the title was a re-release intended to be sold in smaller numbers, it would not have made much sense for Nintendo to pay an expensive new license fee when the quality of the game itself was superb.  

Mario Bros. was re-released for the PAL territories in an updated form sometime in 1993 with a Classic Serie(s) label.  This version was similar to the old release but had better enemy graphics (taken from Kaettekita Mario Bros. for the Famicom Disk System), instructional cut-scenes, an altered level layout and was the music was tuned for PAL speeds.

Classic Series Re-Releases

Legend of Zelda, The
Metroid
Punch-Out!!
Zelda II - The Adventure of Link

These US-only re-releases had no differences from their earlier counterparts from a ROM standpoint (Zelda Rev. A came in a gold cart), but were the only games Nintendo re-released with obvious changes under a Classic Series label.  All have different box and label artwork, and the Zelda games use the standard gray cartridges.  While there are many, many games with minor variations such as 3-screw vs. 5 screw and round vs. oval Nintendo Seal of Quality, these games have obvious cosmetic differences to their original releases.  These releases occurred during the Red Label era, 1992-1994, of the NES's lifespan when the SNES was released.  These Zelda cartridges are less likely to loose data than the gold cartridges because Nintendo had refined their PCBs to work more reliably.  

Licensed NES Games with Revision A/PRG1 (NTSC only unless otherwise specified)

Barbie
Captain Skyhawk
Castlevania
Chessmaster, The
Double Dragon II: The Revenge
Double Dribble
Dragon Ball Europe Only
Dragon Warrior
Dr. Mario 
Faxanadu
Home Alone
Hunt for Red October, The
Jeopardy!
Ikari Warriors
Karate Champ
Kid Icarus (Rev A PAL Only)
Kid Niki: Radical Ninja 
Kirby's Adventure
Lee Trevino's Fighting Golf
Legend of Zelda, The (Both)
Major League Baseball
Mega Man 4
Mike Tyson's Punch-Out!! Both
Operation Wolf: Take no Prisoners
Platoon
Pro Wrestling
R.C. Pro-Am Both
Rambo
Robin Hood - Prince of Thieves
RoboCop 2 
Rygar 
Silent Service
Simpsons, The - Bart Vs. the Space Mutants
Super Mario Bros/Duck Hunt/World Class Track Meet
Super Mario Bros. 2
Super Mario Bros. 3
Taboo - The Sixth Sense
Tecmo Bowl
Tecmo NBA Basketball
Top Gun
Track & Field II
Wheel of Fortune
Wild Gunman
Winter Games
Wizards & Warriors
World Class Track Meet
Wrath of the Black Manta

All the above games have one known, released revision to their ROM(s).  Typically they are referred to as REV. 0 and REV. A or REV. 1.

Some of these revisions are interesting.  The original version of Castlevania has a bug that can crash your game in the hall with the medusas and armored knights just before Death.  The revised version of Pro Wrestling says "Winner is You" instead of "A Winner is You" and says Won and Lost for Win and Lose.  Although transparent to the player, the later revision of R.C. Pro Am uses the Nintendo MMC1 chip while the older version relies on discrete logic (mapper 7) for bankswitching.

Licensed NES Games with Revision A & B/PRG1 & PRG2

Bases Loaded
Indiana Jones and the Temple of Doom (Licensed Original, Licensed Rev A, Unlicensed)
Mega Man 3 Europe Only
Untouchables, The
Zelda II: The Adventure of Link (Revs PAL Only)

All the above have two revisions to their ROM(s).  Typically their second revisions are called REV. Bs or REV. 2.  The Untouchables has a totally different title screen in the latest revision.  

Unlicensed Games with Known Version Numbers

Bible Adventures (v1.0, 1.1, 1.2, 1.3, 1.4)
Bible Buffet (v6.0)
Chiller (Three Revisions)
Double Strike (v1.0, 1.1)
Exodus: Journey to the Promised Land (v4.0, 5.0)
F-15 City War (v1.0, 1.1)
Joshua & the Battle of Jericho (v5,0, 6.0)
King of Kings, The: The Early Years (v1.1?, 1.2, 1.3, 5.0)
Spiritual Warfare (v5.1, 6.0, 6.1)
Solitaire (v1.0?, 1.1)

Multi-Region Games (Japan & US)

1942
Dr. Mario
Excitebike
Mach Rider (Rev A released only in Japan)
Pinball
Soccer
Tennis

Multi-Region Games (World)

Clu Clu Land
Donkey Kong (Rev A Only)
Donkey Kong Jr. (Rev A Only)
Donkey Kong 3
Duck Hunt
Gyromite
Hogan's Alley
Mario Bros. (Rev A released only for PAL)
Popeye (Rev A Only)
Stack Up
Super Mario Bros. (Rev A released only for PAL)
Urban Champion
Wild Gunman (Rev A Only)
Wrecking Crew

Multi-Region Games (US & Europe)

Ice Climber
Kid Icarus (Rev A released only for PAL)
Volleyball

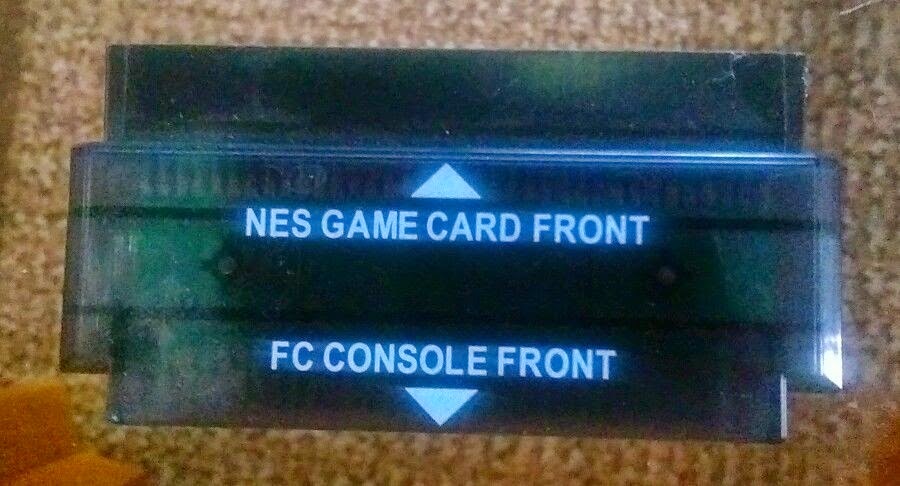
Games that are identical across two or three regions does not necessarily mean the game will be playable on a system from a different region.  The PAL lockout chips will not prevent games from functioning in an NTSC NES unless the console's lockout chip is disabled or bypassed, and vice versa.  NES games will need a pin adapter to work in a Famicom, and vice versa.  I have not included any games Nintendo only released for the Famicom Disk System in Japan, Ice Hockey, Pro Wrestling and Volleyball and were released in cartridge form elsewhere.

Except in one instance, every one of these games are Nintendo first party titles.  When third-party titles were released for the NES, they always add the in-game text "Licensed by Nintendo."  Sometimes this may be the only difference between a US and Japanese game.  US and European releases soon required some kind of adjustment for the differing NTSC and PAL speeds.

Lockout Chips & Countries

NES NTSC
CIC 3193 or 3193A or 6113 or 6113A or 6113B1
United States (USA)
Canada (CAN)
Brazil (unconfirmed)

NES PAL-A "Mattel PAL Version" or "NES Version"
CIC 3197A
United Kingdom (UKV)
Italy (ITA)
Australia (AUS)

NES PAL-B "European Version"
CIC 3195A
Scandavia (SCN)
Sweden (SWE)
Netherlands (HOL)
European Economic Community (EEC)
Spain (ESP)
Germany (NOE or FRG)
France (FRA)

NES PAL "Hong Kong Version" and "Asian Version"
CIC 3196A

NES NTSC "Comboy" or "Korean Version"
CIC 3195A

Foreign Language NES carts (non-Japanese)

Australia
Aussie Rules Footy (A)
International Cricket (A)
Rollerball (A)
Teenage Mutant Ninja Turtles II - The Arcade Game (A)

Finnish
F-15 Strike Eagle (No, Sw, Fi)

French
Addams Family (E, F, G)
Battleship (E, F, G, S)
Defender of the Crown (F)
Dragon Ball (F)
Duck Tales 2 (F)
F-15 Strike Eagle (F)
Kirby's Adventure (F)*
Last Starfighter, The (F)
Les Chevaliers du Zodiaque - La Legende d'Or (F)
Linus Spacehead's Cosmic Crusade (E, F, G, S)
Maniac Mansion (F)
McDonaldLand (F)
Miracle Piano Teaching System, The (F)
Mission Impossible (F)
Monopoly (F)
Nigel Mansell's World Championship Challenge (E, F, G, I, S)
Prince of Persia (F)
Shadowgate (F)
Swords and Serpents (F)
The Smurfs (E, F, G, S)
Ultimate Air Combat (E, F, G)

Korean
Arabian (K)
Macross (K)

German
Addams Family (E, F, G)
Banana Prince (G)
Battleship (E, F, G, S)
Darkwing Duck (G)
Duck Tales 2 (G)
F-15 Strike Eagle (G)
Kirby's Adventure (G)
Linus Spacehead's Cosmic Crusade (E, F, G, S)
Maniac Mansion (G)
Monopoly (G)
Nigel Mansell's World Championship Challenge (E, F, G, I, S)
Pirates! (G)
Prince of Persia (G)
Robin Hood - Prince of Thieves (G)
Shadowgate (G)
Star Trek - 25th Anniversary (G)
The Smurfs (E, F, G, S)
Ultimate Air Combat (E, F, G)

Italian
F-15 Strike Eagle (I)
Maniac Mansion (I)
Nigel Mansell's World Championship Challenge (E, F, G, I, S)
Teenage Mutant Ninja Turtles (I)

Norwegian
F-15 Strike Eagle (No, Sw, Fi)

Spanish
Battleship (E, F, G, S)
Linus Spacehead's Cosmic Crusade (E, F, G, S)
Maniac Mansion (S)
Nigel Mansell's World Championship Challenge (E, F, G, I, S)
Prince of Persia (S)
Robin Hood - Prince of Thieves (S)
Tecmo Cup - Football Game (S)
The Smurfs (E, F, G, S)

Swedish
Deja Vu (Sw)
F-15 Strike Eagle (No, Sw, Fi)
Maniac Mansion (Sw)
Shadowgate (Sw)
Games in bold are unique to that country.  

* - Also released for NTSC in Canada for French Canadians.  The language text is identical to the PAL version for France.

Ports : Famicom Cart to Famicom Disk
Baseball
Bomberman
BurgerTime
Dig Dug*
Dig Dug II
Donkey Kong
Donkey Kong Jr.
Galaga
Galaxian*
Golf
Goonies, The@
Karate Champ
Mahjong*
Mario Bros - Kaettekita Mario Bros./
Pac-Man
Pachicom*
Pinball
Soccer
Solomon no Kagi (Solomon's Key)
Super Mario Bros. & All Night Nippon Super Mario Bros.*
Tanikawa Koji no Shougi Shinan II*
Tennis
Twinbee*
Wrecking Crew
Xevious

* - No NES Release
@ - Playchoice-10 Release only outside Japan
/ - In-game graphics used in Mario Bros. (Classic Serie(s)) re-release for PAL countries

Reverse Ports : Famicom Disk to Famicom Cart (and NES Cart except Bio Miracle)
Zelda no Densetsu: The Hyrule Fantasy - Zelda no Densetsu 1: The Hyrule Fantasy (The Legend of Zelda)
Akumajō Dracula (Castlevania)
Moero Twinbee: Cinnamon Hakase wo Sukue! (Stinger)
Bio Miracle Bokutte Upa
Yume Kōjō: Doki Doki Panic - Super Mario Bros. USA (Super Mario Bros. 2)

Released for both Disk and Cart on same date :
Family Computer Othello

Ports : Vs. System to Famicom Disk
Vs. Clu Clu Land - Clu Clu Land: Welcome to New Clu Clu Land
Vs. Ice Climber - Ice Climber
Vs. Excitebike

Ports : Famicom Disk to NES Cart
Bubble Bobble
Dr. Chaos
Dracula II: Noroi no Fūin - Castlevania II: Simon's Quest
Exciting Basketball - Double Dribble
Final Command: Akai Yōsai - Jackal
Green Beret - Rush'n Attack
Gun.Smoke
Hikari Shinwa: Palthena no Kagami - Kid Icarus
Ice Hockey
Konami Ice Hockey - Blades of Steel
Legend of Zelda 2, The: Link no Bōken - Zelda II: The Adventure of Link
Metroid
Nazo no Kabe: Block Kuzushi - Crackout (PAL Only)
ProWres - Pro Wrestling
Roger Rabbit - Bugs Bunny's Crazy Castle
Section Z
Tobidase Daisakusen  - 3-D WorldRunner
Winter Games
Volleyball
Zanac

Levels : Famicom Disk to NES
Eggerland: Sōzōhe no Tabidachi (and possibly Eggerman) - The Adventures of Lolo

Levels : Famicom Cart to Famicom Disk
Lode Runner & Championship Lode Runner - Super Lode Runner & Super Lode Runner II

Official Famicom Multi-carts:
Donkey Kong Jr. + Jr. [Math] Lesson

This is debatable because it only contains about half of each game, because it is a 24KB cartridge and each of the original games were also 24KB carts, so a good deal had to be cut from each.  DK Jr. cuts out stages 2 and 3 and the B game select option, and only the Calculate function.  The graphics are different in the Calculate function because they reuse tiles from DKjr.

Final Fantasy I & II
Thic cart uses 32KB of battery backed RAM, but each individual cart only has 8KB.  The multi-cart's board is the only one using the MMC1 chip that supports more than 8KB of battery backed RAM.  

Console Upgrading Overkill

Sometimes, upgrades to a console are a good thing.  For example, I have no quarrel with flash carts.  Even though they were not period correct for the most part, the convenience of using one beats buying dozens and dozens of rare and expensive cartridges to play your favorite games.

I have no issue with repairs to a console, where feasible.  Some repairs, like recapping a Turbo Duo or replacing the CD lens of a Playstation SPCH-1001, are necessary to restore the console to working order.  Recapping a board may require a certain advanced level of skill, but it may be necessary to return the console to something as close to the out-of-the-box experience as possible.  For systems with ABS plastic yellowed by UV light, retr0bright and repainting may be the way to go.  I modded my precious Famicom AV, which I bought new in the box around 2003, to support a NES Zapper Light Gun in Controller Port 2.  The mod was simple, I only needed to solder two wires to connect the necessary bits from the 15-pin expansion port to the 2nd controller port.  You would not be able to tell the board had been modified unless you completely removed the PCB from the shell.

However, certain mods I am very uncomfortable with.  Modding a NES to display graphics above composite video quality is one of them.  The true Famicom and NES used the 2C02 PPU that generated NTSC composite color signals, mixing the brightness, hue and saturation signals inside the chip.  The video output is on one pin, making composite video the best video available from the chip.  (S-video would require two pins). For the original Famicom and NES Top Loader, RF was officially the only output available.  Composite video was available from the NES Front Loader and Famicom AV.

The 2C02 PPU has an official RGB variant called the 2C03 PPU which was used in the Playchoice-10 arcade machine and an identically functioning 2C05 PPU used in the Sharp Famicom Titler.  You can replace a 2C02 with a 2C03 in a Famicom or NES, but desoldering the chip is not for beginners.  The 2C03s are hard to come by and extremely expensive.  However, the 2C03 PPU is not 100% compatible with its composite brother.  Two of the grays in the composite PPU are missing from the RGB PPU, which will render them as black, resulting in a loss of detail in games that use them.  Colors will look a bit off and rather garish compared to the composite PPU.  Second, The Immortal, James Bond Jr., Just Breed, Magician, The Jungle Book, the Lion King, Noah's Ark and Felix the Cat use the color emphasis bits to darken the entire screen with a composite PPU, but with an RGB PPU, these games will show a totally white screen, making them completely unplayable.  (Just Breed is one of the very few Japanese games to use color emphasis throughout the game, so the issue is not as pronounced for Japanese games.)  A few other games, Final Fantasy 1 and 2, Super Spy Hunter and The Fantastic Adventures of Dizzy, use color emphasis for minor effects that do not affect gameplay.  The Titler converts RGB into S-Video, it doesn't output RGB natively but can do so without too much trouble.  Now there is one caveat to the rule that NES games should always use composite video.  It would seem likely that Nintendo's in-house development hardware may have used 2C03 PPU.

Today there is a modification board called the NESRGB.  This is a daughterboard which you mount the PPU into (after desoldering it from the NES mainboard).  The FPGA on the NESRGB monitors PPU accesses, take information from the palette registers and combines them with the video output signal to digitally convert the color into RGB.  This mod has the huge advantages of not requiring a rare 2C03 and does not perform an imprecise analog composite to RGB conversion like the French NES.  Unfortunately, the mod is more difficult than the 2C03 mod because you must save the 2C02 PPU.

Kevin Horton (kevtris) and Jason over at Game-Tech.us are deep in development of a Hi-Def NES mod that installs similarly to the NESRGB.  However, it outputs to an HDMI cable at 720p or 1080p.  It also emulates the NES and expansion audio channels, because they cannot be captured digitally like the video can.  It can also apply smoothing scalers and scanline filters.

If you don't want to mod your NES, then you could consider the Super 8-bit Video Game System :  https://www.tindie.com/products/low_budget/super-8-bit-console-with-new-v30-pcb/
At $499.00, it will hit the wallet really hard.  Its case is made out of aluminum and it supports RGB, S-Video, composite video and stereo sound.  It uses 2A03s and 2C02s reclaimed from Nintendo machines but the PCB is a custom design and the rest of the components are new.  It has a NESRGB board built in. It has two NES controller ports properly spaced for the four player adapters and a Famicom expansion port.  The latest revision of the PCB also supports the Famicom microphone, something not implemented elsewhere outside an original Famicom.

Bunnyboy of NES PowerPak fame has been devolping an HDMI NES.  This is a complete clone, and should be far more accurate than the typical Taiwanese System-on-a-Chip designs.  However, the hardware that will emulate the NES is far, far more powerful than the NES, so I ask how different is it than running a NES emulator and outputting it to a TV?  One advantage will be that there will be less, if any input lag to deal with from reading the controllers or having the LCD interpolate the standard definition frame, since the system will output in 720p/60fps.  The picture will be sharp as it can be on modern LCD TVs, hopefully the device will be able to get all the PPU and APU quirks right.

Another unnecessary NES mod is the so-called stereo sound mod.  The 2A03 CPU contains an Audio Processing Unit that outputs audio on two pins.  One pin contains the two pulse wave channels and triangle wave channel, the second pin contains the noise and PCM channel.  These can be split into separate outputs easy enough, but the NES was not designed for stereo sound.  Most games use the pulse and triangle waves for music and the noise and PCM for percussion and sound effects.  I think the resulting sound is very unbalanced toward the waveform output.  Earlier games tended not to use the PCM channel, so the output for it and noise would sound very quiet.

On the other hand, modding the original Famicom or Top Loader NES to output composite video is a worthy endeavor.  The Famicom was RF only, and the Japanese RF channels are well-nigh impossible to turn perfectly to US TVs.  Composite video is universal in NTSC countries, RF is not.  When the Famicom was released, the Sharp My Computer C1 TV was also released and it used an internal composite video connection.  Gaming magazines would take their screenshots from this TV because of the improved picture quality.  The video output quality of a standard Top Loader NES is comparative garbage, but it can be brought into line with the Front Loader NES and Famicom AV with a mod.  The Sega Master System Model 1 has composite and RGB output at its DIN, but the Model 2 has RF only and requires a mod to support either.

When you upgrade to the 4th and 5th generation systems, then RGB becomes available for all of them, many via a modification, but the original SNES, Playstation, NeoGeo, Atari Jaguar, Phillips CD-i, the Sega Master System, Sega Genesis Models 1 and 2, Sega Saturn and Dreamcast offer it on their AV connector.  The N64, Turbo Grafx, CD-i and 3D0 can be modified to support it, one way or another.  For those of us in the United States, true analog 15kHz RGB monitors were rare.  Component video is the closest substitute, but RGB to Component video conversion requires a converter box.  RGB is pushing it, especially with the Genesis.  The Genesis was known to use dithering that NTSC resolution and decoding would not completely resolve, but would look extremely pixelated on an RGB system.  The SNES games can also take advantage of the fuzziness of composite video when dithering.  The early 3D consoles like the N64 and Playstation tend to take advantage of the natural anti-aliasing effect that composite video can produce.  Viewing these consoles in RGB, where most of their 3D is in a low resolution form, shows sharp jaggies.

One last issue I want to address is how many people enjoyed RGB when these consoles were the current generation?  RGB, even in Japanese (JP-21 connector) and European TVs (SCART connector) was strictly high end in the 1990s.  The main TV may have had a connection in the more affulent homes, but many video game consoles tended to be relegated to the second TV.  Hours of video game playing tended to tie up the main TV, so parents tended to insist that a video game system be connected to another TV.  The second TV would be lucky to have composite video, and many people didn't know better and simply used their RF switch.

Saturday, October 25, 2014

Famicom AV : Issues and Solutions


Famicom AV Box, Console and One Controller (Not Shown, Second Controller, AV Cable, Manual and Warning Card)

One of my first blog posts was about the Famicom AV, the final iteration of the 8-bit NES hardware.  Released in late 1993, it was modeled after the NES Top Loader.  Unlike the Top Loader, or the original Famicom which it replaced, it boasts the best composite video quality of any of the NES consoles.  It completely lacks the video jailbars that are notorious on the Top Loader, quite visible on the Famicom and still can be seen in a small way even on the NES Front Loader.


It is much more import friendly because it does not use an RF adapter tuned to odd frequencies as in the Famicom (US Channels 95-96) and does not have the Famicom's hard-wired controllers.  It retains compatibility with the Famicom Disk System and all Famicom expansion controllers and devices.  It can play any US game with a pin converter and doesn't care about a lockout chip.  These were the last systems Nintendo made, and they are very reliable and well-built.  Fortunately, using one outside of Japan is easier (if not cheaper) than ever before, so with that I present an updated guide :

1.  Power Supply


If you get a Famicom AV in the box, it comes with the console, two restyled "dogbone" controllers and the manual.  It did not come with a power supply because it was intended to replace the buyer's existing Famicom.  The buyer was expected to use his original power supply.  The NES power adapter will not work because it outputs AC and is converted to DC in the console.  It should never, ever be inserted.  The SNES power adapter would work, but the connector is very different.

The proper Famicom or Famicom AV power supply adapter is rated for 10v DC, 850mA, center tip negative.  Fortunately, the most convenient solution in the United States and Europe came, ironically, from arch-rival Sega.  The power supply adapter for the Sega Master System and Sega Genesis/Mega Drive Model 1 fits in the Famicom AV's power socket and has the correct specs.  These power supplies, or third-party adapters, are common enough to find.  Radio Shack should have a suitable power supply adapter, and  you should use an M Adaptaplug with it on the Famicom AV.

2.  Controller Cables


The cables on the included dogbone controllers are only 3' long.  This made some sense for a Japanese household where space is at a premium, but a US household has much more square footage.  NES controllers are 6' long.  One solution is to use NES extension cables, which are much easier to find today than they were 10 years ago.  Another solution is to use the NES Satellite or Four-Score, which can act as an extension.  The NES Satellite or Four-Score will NOT allow you to play as player three or four in Famicom games, they only work with NES games.  You can play NES 4-player games on the Famicom AV with a suitable pin adapter.

3.  Zappers and other Controller Port 2 Input Devices


While the Famicom AV's controller sockets look identical to the NES's sockets, there is a difference between them.  The NES connects +5v, Ground, Clock, Latch/Output, D0, D3 & D4 on both ports.  The Famicom AV's ports leave out D3 and D4.  The standard controller only uses D0.  The Zapper (including workalikes like the Konami Laser Scope), Power Pad, Arkanoid VAUS Controller all rely on D3 and D4.


Fortunately, the signals for the second controller port D3 & D4 are available on the 15-pin Famicom expansion port.  You can solder a pair of wires from that port to their respective lines on the second controller port on the front of the Famicom AV.  Here is a photo that shows the wiring :


Taken from : http://forums.nesdev.com/viewtopic.php?p=34665#p34665

One alternative is to obtain the Famicom equivalent of the Zapper, the Video Shooting Series Light Gun which looks like a western six-shooter : http://famicomworld.com/system/controllers/video-shooting-series-light-gun/  It is nowhere near as common as the Zapper.  The Japanese version was never bundled with the console and only supported in five Famicom games, as opposed to fifteen licensed and unlicensed NES games.

The Famicom equivalent of the Power Pad is called the Family Trainer Mat and was only released by Bandai in Japan.  It supports ten unique games, five of which found their way to the NES.  The NES has one exclusive, Short Order / Eggsplode!.

Unfortunately, the Famicom Arkanoid controller will not work with the US version of Arkanoid, and the US version of the Arkanoid controller will not work with the Japanese versions of Arkanoid, Arkanoid 2 or Chase HQ.

If you want to make sure own adapter, you will need the end of a Famicom expansion port controller or a Neo Geo MVS Controller expansion cable and a NES expansion cable or controller socket.  I would strongly suggest a continuity tester to determine what wire connects to which pin.

4.  AV Port


While the Famicom AV comes with a stereo AV cable, if you buy a loose console, you can use any SNES, N64 or Gamecube Composite Stereo or Mono AV cable.  The Famicom AV's audio is mono only, both the red and white jack outputs the same signal.  No NES or Famicom supports stereo audio.

You may need an RCA splitter if you have a mono cable and your TV has stereo inputs.  Otherwise you may hear sound only out of one speaker.  S-Video and RGB-SCART (only) Nintendo Multi-out cables will show no video, the Famicom AV is composite only. There is no internal RF adapter in the system, but the RF adapter and cable that attach to the Nintendo Multi-AV Out port will also work or you can use an external RF adapter such as from Radio Shack.

5.  Flash Carts


The best flash cart for either the Famicom or Famicom AV is the Everdrive N8, which has a 60-pin Famicom version.  No need to fiddle around with converters as with a NES PowerPak or Everdrive N8 NES version.  The Everdrive supports expansion audio, Famicom Disk System images, the common mappers. and several Japanese-only mappers.  It also has a battery for saving games to RAM without turning off the cartridge.  It does not add nearly to the jailbars in the video output, unlike the PowerPak.

6.  NES-to-Famicom Cartridge Converter

The NES uses a 72-pin cartridge connector, the Famicom uses a 60-pin cartridge connector.  Unfortunately, most of the ones available on the market are not fully compatible with certain NES games.  Lazy and cheap converters tie Famicom pins 48 & 49 together. These are three of them :


This what most, but far from all, Famicom or NES cartridges do.  Some NES cartridges (MMC5 games, Gauntlet, Rad Racer 2, After Burner) that do advanced things with the graphics name tables need the pins separate and fail to work when they are not.  Additionally, the Everdrive N8 and NES PowerPak need those pins separated.  You will have to cut the pins and wire them up to the appropriate pins.

This is the best converter I have found.  While it needs the mod, it fits well inside a Famicom AV.


1.  Fixing the Cartridges that use advanced Nametable Mirroring methods

Most Famicom cartridges tie pins 48 and 49 together.  Similarly virtually all NES cartridges tie pins 57 and 58 together.  When they are tied together, regular nametable mirroring methods are available.  Nametables are the name given to the tile maps for the backgrounds and the NES has enough internal RAM for two. When separated, the cartridge can add additional nametables with RAM inside the cartridge or map Character ROM directly to nametables.  The following NES cartridges have the hardware that can or does take advantage of this :

After Burner
Bandit Kings of Ancient China
Castlevania III: Dracula's Curse
Gauntlet
Gemfire
L'Empereur
Laser Invasion
Nobunaga's Ambition II
Gauntlet
Romance of the Three Kingdoms II
Uncharted Waters

Castlevania III is the only game on this list to have a licensed PAL release.  In addition, the PowerPak and the Everdrive N8 require these pins separate as well.  There is also a reproduction NES cartridge of Rocman X by Sachen (which may have originally been a Famicom cart) which requires this mod to run in the converter.  More advanced experimental and hobbyist NES boards will require it.  There are more Famicom cartridges that use ROM or RAM nametable mapping or require the pins to be separated, including all MMC5 games and all Namco 129/163, Konami VRC6 and Sunsoft-4 games and Napoleon Senki.  Any reproduction or pirate NES cartridge of those games will also need the mod as well.

The fix is simple enough, first cut the trace on the Famicom cartridge edge between pins 48 and 49.  Next, solder a wire from NES pin 58 to Famicom pin 49.  Finally, solder another wire from NES pin 57 to Famicom pin 48.  

2.  Adding Expansion Sound

The NES PowerPak and Everdrive N8 NES Edition support expansion audio.  They use NES pin 51 to output the expansion audio. Because the NES had no official method of routing expansion audio, the PowerPak decided to use the otherwise unused NES pin 51 and the Everdrive followed suit.  Any NES reproduction cartridge of a Famicom game like Gimmck! or Just Breed will also follow suit.  NES pin 51 connects only to the unused expansion connector on the underside of a front loader, and a resistor can connect that pin (pin 3) to the pin (pin 9) with  47K resistor that will mix the cartridge audio with the internal NES audio. 

Fortunately, the Famicom does not need a mod because it has a pair of pins, 45 and 46, which allow a Famicom cartridge to mix in cartridge based audio.  If the cartridge hardware does not support external audio, these pins will be connected together.  If it does, then it will separate the pins and mix the internal Famicom audio coming in from pin 45 with the cartridge audio and send the mixed signal to cartridge pin 46. From there it goes directly to the Famicom's RF unit or the Multi AV of the Famicom AV.  

This mod is really easy, but you will be using 10K resistors to perform the connections.  First, cut the bridge between Famicom pins 45 and 46 on the converter.  Next, solder a resistor from NES pin 51 to Famicom pin 46.  Finally, solder a second resistor from pin 45 to the leg of the resistor nearest the Famicom pin connector.  If you find the resulting audio not to your liking, you can use potentiometers instead.  I would suggest using a value of less than 10K on the resistor coming from the AV Famicom, as its volume output is slightly lower than the older Famicoms.  

7.  Microphone


One minor issue with the Famicom AV is that it does not support the microphone on the second controller of the Famicom.  You can find a list of games that use it in this thread : http://www.famicomworld.com/forum/index.php?topic=2355.0

In most instances, the microphone only has marginal use at best, but there are three or four Japanese games that require using the microphone at some point to progress.

An alleged issue is that expansion audio from those cartridges which contain it supposedly drown out the internal audio.  Non-AV Famicom with earlier circuit boards have been said to have louder internal audio output, but Famicoms with later circuit boards have quieter internal audio.  In my opinion, there is little in the way of solid, concrete evidence to support this.  In fact, the audio circuits seem to be the same regardless of Famicom or Famicom AV console used.  Additionally, there is no apparent difference in the loudness between the 2A03G used in later Famicoms and the 2A03H used in most Famicom AVs.  There is a difference between the 2A03E used in the earlier Famicoms and the late Famicoms, so expansion audio will be a little more punchy with the Famicom AV.  However, it is a mistake to believe that expansion audio drowns out internal audio in the Famicom AV.

Thursday, October 23, 2014

4.77MHz 8088, You're Needed!

The floor for all PCs, in terms of speed, is the Intel 8088 CPU running at 4.77MHz, the speed it ran in the IBM PC Model 5150 released in 1981.  However, there are various nuances when it comes to PC speed :

The IBM PCjr. also ran at 4.77MHz, but its access to 128KB of RAM was substantially slower than the PC because the video chip also accessed memory to refresh the memory.  It could decrease performance by 15-20%.  However, if software is ran in memory above 128KB, the performance is slightly better than the IBM PC.  Because the PCjr. was not designed to use more than 128KB, at least in the beginning, most early software did not account for the speed increase.  On the other hand, most PCjr.-specific software was contained on cartridges or self-booting disks and did not need RAM about 128KB.

A DOS rip of a PCjr. booter may run too fast.  Lode Runner is a good example of a game with this problem.  Fortunately it does have a speed adjustment that can reduce the speed to sane levels.  This is, however, a rare feature.

Most 8088s in the PCs and compatibles, including all the IBM PCs, XTs most of the PCjrs, were socketed.  The NEC V20 was a very popular upgrade and was a simple replacement for the 8088.  It could increase performance by 15-20%, depending on the application.  Later, ISA accelerator cards like the Orchid Tiny Turbo and the Intel Inboard 386PC plugged into an ISA slot and the CPU socket and could speed up the system to be the equivalent of a low end AT or 386 machine.  Some brave users would try to overclock their machines by using crystal-switching devices like PC Sprint, which allowed the processor to use a faster clock crystal while the rest of the system used the standard clock crystal, vital for system timing.  

Later PC compatibles bumped the clock speed (Tandy 1000 SX, EX and HX), used a V20 (Tandy 1400) or the 8086 with a true 16-bit data path to RAM (some Compaq machines, Tandy SL, SL/2 and RL, IBM PS/2 Models 25 and 30) to improve speed without seriously sacrificing compatibility with software that relied on the basic speed.  Usually one speed "bump" would not be sufficiently serious to break software, but gameplay, sound effects and graphical effects could be affected when compared to the base machine.

However, when IBM released the IBM PC AT in 1984, it included a 6MHz 80286, which could run applications three times faster than the original PC or XT.  All the software that had been written before the AT's release had only to cope with one speed, so code that was dependent on processor speed could run far faster than intended.  Even when the AT was released, programmers did not necessarily put speed checks in their code overnight, the AT was an enormously expensive machine and games would be the last kind of software expected to run on it.  Thus for a five year period, 1981-1986, game software was generally designed to run on a 4.77MHz 8088.

In addition to the CPU speed, the speed of the video card sometimes needs to be taken into account.  The IBM Color/Graphics Display Adapter was the first graphics card for the IBM PC and compatibles, and it was widely cloned.  (By contrast, the IBM Monochrome Display and Printer Adapter could only show 80-column text and was not suitable for most games).  The PCjr. was only semi-compatible and the Tandy 1000 was (almost) fully compatible with IBM CGA, but it accessed memory far faster than the IBM card.  Some games rely on the performance of the IBM CGA card to produce special graphical effects.

Eventually, most early games will break sooner or later as the processor speed and generations increase, or the CGA hardware found less and less support with more advanced graphic cards.  Some games, however, like Shamus and Alley Cat, were famously far-sighted and could be run on virtually any system that can run DOS, regardless of processor speed.

IBM PC 4.77MHz

Defender
Defender simply runs too fast when the speed becomes any greater than one bump.  Forget about it running at a playable speed on a 286, even one that has been slowed down to 4MHz as with a Tandy 1000 TX or TL.  A 4MHz 286 is about as an 8MHz V20 or 8086.

Ultima I-IV
All of the first four Ultima ports to the PC vary the length of their sound effects, the speed of attacks and the spawning rate based on the system speed.

Dunzhin: Warrior of RAS
Dunzhin features synthesized speech, and the pitch of the speech is speed sensitive.  "Welcome to Dunzhin!"

IBM PCjr. 4.77MHz

Lode Runner & Championship Lode Runner
These games detect the presence of the PCjr. and adjust their speed.  Running games like these as a DOS conversion will result in the action running very fast.  The speed settings contained in the game may not fully compensate.

IBM PCjr. 4.77MHz and Tandy 1000 4.77MHz

Touchdown Football
This game was released by Imagic first for the PCjr. and somewhat later for the Tandy 1000.  At this point, the Tandy 1000 only ran at 4.77MHz and came with 128KB of RAM onboard.  The PCjr. version could run in a 128KB Tandy 1000, but the digitized speech would play back too quickly because the Tandy does not have same the speed penalty for memory accesses in its 128KB of RAM.  If you were able to accelerate your PCjr., the speech would playback too quickly.  The digitized speech in the Tandy version is affected by any speed bump, such as the 7.16MHz Tandy 1000 SX.  Fortunately, Tandy allowed you to change the speed of the CPU to 4.77MHz either at boot-up or in DOS.

IBM PC 4.77MHz and Tandy 1000 4.77MHz

Super Boulder Dash
As discussed here : http://nerdlypleasures.blogspot.com/2016/08/boulder-dash-pc-speed-and-joysticks.html, the joystick will respond correctly only at this speed.  Fortunately it will still work with a V20 CPU at this speed.

IBM CGA Graphical Effects

Frogger & Jungle Hunt
Frogger and Jungle Hunt rely not so much on processor speed as they do on CGA speed to achieve the effect of making a change in the background color (Frogger) or palette (Jungle Hunt), in mid-frame.  Thus, the default graphics in Frogger will show blue water on the top and black pavement on the bottom, and show a white score text (using the intense cyan, magenta and white palette) on the top and green, red and brown in the playfield for Jungle Hunt.  Even at 4.77MHz, I discovered that at least Jungle Hunt will have an issue with initiating the palette switch on the right scanline when I was using an ADP-50L hard drive controller.  Using a different hard drive controller fixed the issue.

Digger
Digger uses a color-cycling effect on its High Score screen that looks properly when run on a 4.77MHz machine with a CGA card.

8088MPH & Area 5150
8088MPH is a 2015 demo will only run correctly with a 4.77MHz 8088 CPU and an IBM CGA card. It relies both on the speed of the CPU and the video memory speed access of the CGA card, as well as the composite colors generated by the IBM CGA card.   It has different settings for Old and New IBM CGA cards.  Area 5150 is a 2022 demo by the same team which brought us 8088MPH which absolutely requires the same hardware configuration.

Saturday, October 18, 2014

Hand-held gaming mods : Success and FAILURE!

If failure is one of the basic freedoms, as the Fourth Doctor tells D84, a sentient robot in the Robots of Death, then I have had been feeling very free lately.

Lately I have had a resurgent interest, as regular readers of this blog may note, in the Game Boy line.  I had a Game Boy Pocket and finally decided to try to install a backlight into it.  I ordered my backlight from Hand Held Legend, and it came very quickly.  I wanted a white backlight so as to minimize the color change when the backlight is installed.  While it will not look exactly the same, the Pocket's screen is close to true grayscale.

Before I could add the backlight, I discovered that the A/C power socket was not providing power to the system.  Batteries would work, so I guessed it was a bad connection.  I did not have a multimeter handy which I could use as a continuity tester.  The only schematic I had was for a Game Boy Color, and while the power section is very similar, there are differences.  I was able to fix the issue by soldering a wire from the positive pin to the positive battery terminal.  I do not believe that socket is connected exactly in this way and I may have destroyed an Official Nintendo Game Boy Pocket AC Adapter getting it to work.  I believe that at the very least there is a diode between the positive pin and terminal.  Fortunately, I had bought a Radio Shack (Enercell) 3v/700W AC adapter that worked.  You need to get an Adaptaplug Type A and the tip must be positive.  Unfortunately the wire I used for the patch was a bit too thick at .22 or .24AWG to snake it comfortably around the case.  Most Game Boy cases are tight, and tighter than they look when it comes to mods.

Okay, I fixed the AC power socket so I could use my 64MB GB Smart Card.  With the AC attached, there are no issues with contrast fluctuations with the screen.  I have read that this is also a concern with the vastly superior EverDrive GB, one of which I hope to obtain by this Christmas.

Now came time to install the backlight.  To install a backlight in a Game Boy or Game Boy Pocket, you need to remove the reflective and polarizing layers from the glass Liquid Crystal Display.  In order to remove these two layers, you have to wedge a razor blade between the layers and the glass, get a corner separated and then carefully pull the layers from the glass without destroying the screen.  The screen has connections horizontally and vertically, and the layers are affixed to the screen with some kind of adhesive.

The hardest part of the mod is removing these layers without cracking the screen or irreparably damaging the connections between the screen and ribbon cable.  While the screen comes totally away from the PCB, the ribbon cable goes up the back where you need to pull.  You have to get your razor blade in there without slicing the ribbon and pull all the layer off without damaging the ribbon or dislodging the ribbons connections.  I thought I did it right, but after I removed the layers from the Game Boy Pocket's screen, I found I had damaged the connection between the screen and ribbon cable.  There was a large gap in the scrolling "Nintendo", at least 16 pixels wide.  Unfortunately, unlike with an original Game Boy, heating up the area where the ribbon cable meets the screen with a soldering iron will not fix it.  I was able to get the lines appear some of the time by bending the ribbon on the bottom forward quite a bit, but this was obviously not a solution that would work in the long term.  Scratch one Game Boy Pocket.

I was not dispirited by this disappointment, and I knew that my local vintage gaming shop had an Original Game Boy, and I bought it off them for $20.  It was a bit dirty, the screen protector needed replacement and I could see that dirt had found its way onto the screen, but nothing that my used toothbrush and can of compressed air couldn't fix.  Fortunately the backlight I acquired can work in either a Game Boy or a Game Boy Pocket, and can fit inside the area for the screen without cutting.  Unlike the Pocket, the screen does not come totally off the PCB (the Game Boy has two PCBs).  The ribbons are soldered to the PCB, and you need to lift the screen up enough to get at the layers but not so much that you rip the ribbons from the PCB.

People online said that removing the layers from a Game Boy's screen was easier than the Game Boy Pocket's screen.  Unfortunately, I found it to be six-of-one, half-a-dozen of the other.  The inner layer did not come off easily, I had to peel it off pieces at a time and probably left razor nicks in the glass.  When I put it back together, I found that I did not have dead pixel columns.  Instead, the lower right corner looked like I had cracked it when I peeled the last of the layers off.  It looked similar to how a broken pocket calculator's LCD looked.  The rest of the screen functioned normally.  Scratch one DMG Game Boy.

The Game Boy after the back-light was installed, I threw out the Pocket before I could take its picture.
In one day I had essentially destroyed two great vintage video game systems.  However, I was still undaunted and determined to mod a hand-held system successfully.  Ten years ago I had bought an Afterburner Kit for my Game Boy Advance.  The complexity of trying to install the front light in my GBA put me off trying it, and once the front-light GBA SP came out, I bought one and the Afterburner went into my miscellaneous console stuff drawer.  Occasionally I would pull it out and contemplate installing it, but I would look at the lengthy instructions and turn back to my backlit GBA SP.  However, determined to have something to show for all my modding efforts, I grabbed a lightly used GBA I acquired and went to work.

The Afterburner is a PITA to install, no bones about it.  The hardest part for me was scraping down the plastic in the screen area.  All those little bits of plastic tend to create dusty conditions that tend find their way in between the screen.  I did not use a dremel because I did not know if I would carve too much and create holes in the front of the case.  That was a mistake.  I apparently lost the included 44 ohm resistor that goes to reduce the screen brightness.

They also give you these really tiny wires, which were difficult to strip with my wire stripper.  In addition to the front light, there is a piece of anti-reflective film that is supposed to go between the front light and LCD screen. Getting this thing on the LCD without bubbles forming was impossible.  Snaking those wires around the PCB was a miserable experience, and soldering the wires to the tiny potentiometer to control screen brightness and mounting it to the case was a miserable experience.  When everything was finally done, the case did not have the same snug fit as it did before I touched it.

I installed the backlight and found the result to be terrible.  The screen looked totally washed out and I had a hard time making out objects on the screen.  Game boy games were a little easier to see.  I thought installing the potentiometer would improve things, but it really didn't.  It was easier to make out the screen from an angle than from a head on view.  I thought I may have screwed up the AR film somehow.  I opened up the system, fiddled around with with and found that things looked better when the AR film was not present!  Maybe my AR film was defective or maybe I lost the proper layer in the last ten years.  I reassembled the GBA and found the results to be more tolerable, although it pales in comparison to my back-lit GBA (for which I had traded in my front-lit GBA).  Unfortunately when I was playing around with the front light and AR film, I had caused a few, quite visible, scratches to appear on the front light.  There is a bit of dust on the bottom part of the screen, but still I consider this mod much more successful than my Game Boy backlight mods.

The Game Boy Advance after the front-light was installed, the horizontal lines are a camera artifact.
The same system at an angle, you can see the scratches and dust, but the graphics are clearer than they appear.
Lessons I have learned from these experiences:

1.  Use thin wires, but thick enough to strip.

2.  A dremel is a wonderful tool, worth every penny.

3.  Have a safety razor handy.

4.  See through consoles help with threading wires.

5.  Have a spare screen protector ready

6.  If you don't break your Game Boy or Game Boy Pocket screen installing a back light, consider yourself fortunate.

7.  A dab of hot glue is not an evil thing.

Thursday, October 16, 2014

Retro Releases - Working within Limitations

When a home video game console is developed, often the designers could not predict how long the system would last.  The Atari 2600 was designed in 1976 and the last games were released for the system in 1990.  During the lifespan of a successful console, programmers would often push the hardware to limits well beyond what was thought possible when the system was designed.  

Console systems that relied on cartridges had one severe limitation, space.  The larger the ROM cartridge, the more costly it was for the publisher to make.  Adding special features like battery-backed save RAM or advanced functionality (like a MMC chip for a NES game, an MBC chip for a Gameboy/Color game, or a SARA chip for an Atari 2600 game) was even more expensive.  However, as manufacturing costs for cartridges decreased, larger games would become more economical.  Eventually, there came a point where space and functionality could, late in a console's life, only go so far to hide the age of the underlying hardware.

For an Atari 2600 game, 16KB was considered a large cartridge at the end of the console's life.  512KB would be about as large as most NES, SMS and non-color Gameboy games would get, 3MB for a Sega Genesis game and 4MB for a Super Nintendo game.  Even though most of those systems had larger games available, at those sizes the games were approaching the upper limits of what was feasible during the console's lifespan.  

Today, many, many programmers and developers make retro-themed games.  Often these games would have graphics that would hearken back to the 8-bit or 16-bit eras and have music to match.  Almost always, these games would be released for the Windows PC platform, the Intel-based Macs, or for Android or iOS mobile OSes.  Many would be available to download through a digital download source like Steam or an App store.  

These games lack at least two crucial features of real console games.  First, they have no permanent form, they exist entirely within the digital domain.  If your hard drive is wiped and your Steam account is deleted, there goes your game.  Sometimes they have DRM, so if Steam goes down then your access may be gone forever, despite having the program on your hard drive and backup.  By contrast, a cartridge (or a CD) has its own existence and the game's survival depends only on how well you treat the cartridge.  You can sell or trade or lend the cartridge as you please.  Licensing restrictions really never worked to keep people from doing any of these things.  

The second issue is that most of these games will never be remembered with the same fondness as Super Mario Bros. or Sonic the Hedgehog.  Those games were played by tens of millions of people, were ground breaking and state-of-the-art in their day, had significant cultural impact and historical significance.  A retro-style game may be very well received today, but its impact will probably pale in comparison to the giants that came before it.  

Retro-style games have a substantial advantage over the classic console games : they are run on vastly more powerful hardware.  Retro programmers tend not to have to worry about CPU cycle counting, assembler optimization, IRQ timing, sprite limitations and lack of sound channels.  By modern standards, it is a miracle that the NES and similar systems were able to run such games as they did.  No retro-style game need put up with these limitations, and even some that claim to do so (Mega Man 9 & 10) cheat when necessary.

Of course, with a game developed for a particular system, it must be contained on a cartridge if you want people to play it.  It simply was not feasible for most programmers to self-publish a cartridge in the 1980s or 1990s or even into the 21st Century.  Any such publishing was typically limited to Atari 2600 games, which are among the simplest cartridges to make.  

For more advanced systems, there are many difficulties in releasing a new game.  Burning EPROMS and soldering them onto donor carts to test games was not attractive to most people. Moreover, using donor carts is just not feasible for publishing a new game, new cartridge boards had to be produced. Unlike a pre-crash game, which could be programmed by one person, a complex game for the NES, SNES or Sega Genesis typically requires a team of several people.  Whatever price the game is sold for will not pay for the thousands of man-hours it took to create a game.  Game development must be balanced with real-life realities.  Also, there is a real probability that once your game is released, the ROM will be dumped and spread across the Internet.  

However, even though a game may be developed or ported to work on a real hardware system, there are examples when the hardware is simply way too advanced for the console.  At this point, the console becomes little more than a generic device that supplies power and inputs to the game.  The SNES MSU-1 is an example of too much hardware.  It can store and allow the SNES to access 4GB of data!  Not even if the canceled CD-ROM attachment came out could the SNES access so much storage space.  CD-ROM attachments were not seamless, players had to suffer load times, CD audio track reloading and the ever present drive noise.

I respect any game developer who is willing to work within reasonable constraints and able to produce memorable games.  Pier Solar is an example of a game that, while it pushes the limits of a Sega Genesis a bit (8MB cart), is still an original game that fits within the Genesis RPG library.  Battle Kid 1 & 2 for the NES are excellent games that would not have seemed out of place during the NES's heyday.  However, the number of new, substantial (not puzzle games) cartridge games for home consoles is still very few in number.

One last comment on homebrew games is that I cannot feel that a game is fully legitimate unless it is released on a cartridge.  ROMs are nice, and if they run on a flash cart that is great, but to have a unique cartridge, preferably with a box and manual, truly confirms a game as legitimate and tends to avoid issues with them being lost to time.

A related issue is the release of "VGA upgrades" to old adventure games like King's Quest I, II & III, Space Quest II, Quest for Glory II.  The trouble I have with them, besides the inconsistent quality of the updated graphics, is that while they purport to look like an SCI1-1.1. game, underneath they are anything but.  They do not use Sierra's SCI engine but Adventure Game Studio.  While they do nothing that would push a 486, they are meant to run on nothing less than a Pentium II and create 100MB save games.  Totally inefficient and wasteful.

As of June 13, 2015, here are the NES Homebrew carts that you can buy.  Items in yellow are currently out of stock.

Title Company/Developer Includes Optional Ordering Site
2 in 1 Geminim/Siamond Sivak Dust Sleeve
http://www.retrousb.com/product_info.php?cPath=30&products_id=59
Armed for Battle Rizz Dust Sleeve Box & Manual http://www.infiniteneslives.com/armedforbattle.php
Battle Kid 2: Mountain of Torment Sivak Manual, Dust Sleeve Box & Art Book http://www.retrousb.com/product_info.php?cPath=30&products_id=121
Battle Kid: Fortress of Peril Sivak Manual, Dust Sleeve
http://www.retrousb.com/product_info.php?cPath=30&products_id=86
Beerslinger Greetings Carts

https://www.etsy.com/listing/234297536/beerslinger-nintendo-nes-brand-new?ref=shop_home_active_2
Blow 'em out Greetings Carts
Box & Manual, Personalized Cart https://www.etsy.com/listing/215571036/blow-em-out-a-personalized-original
Chunkout 2 James Todd Dust Sleeve
http://www.retrousb.com/product_info.php?cPath=30&products_id=65
GemVenture Tom Livak

http://www.retrousb.com/product_info.php?cPath=&products_id=92
Glider RetroZone Manual, Dust Sleeve, Box, Insert
http://www.retrousb.com/product_info.php?cPath=30&products_id=58
Homebrew World Championships (HBWC) 2012 Multiple Dust Sleeve
http://www.retrousb.com/product_info.php?cPath=30&products_id=129
Larry & the Long Look For a Luscious Lover KHAN Games Manual, Dust Sleeve, Box, Insert
http://www.retrousb.com/product_info.php?cPath=30&products_id=133
Mad Wizard, The Sly Dog Studios

http://www.retrousb.com/product_info.php?cPath=30&products_id=137
Mystic Pillars Sivak Dust Sleeve
http://www.retrousb.com/product_info.php?cPath=30&products_id=55
Nighttime Bastards One Bit Games Manual, Dust Sleeve Box http://www.infiniteneslives.com/nighttimebastards.php
Nomolos: Storming the Catsle (Re-release) Gradual Games Manual, Dust Sleeve Box http://www.infiniteneslives.com/nomolos.php
Star Versus Studio Dustmop Manual
http://starversus.com/
Study Hall KHAN Games Dust Sleeve Box & Manual http://www.retrousb.com/product_info.php?cPath=30&products_id=128
Super NeSnake 2 Matrixz Dust Sleeve
http://www.retrousb.com/product_info.php?cPath=30&products_id=60

Sitting this One Out - The Lack of an American Presence in the Third Generation of Console Video Games

After the video game crash of 1983-84, there were far fewer companies making video games than at the height of the second generation of home video game consoles.  What companies remained focused solely on home computer games.  When the NES kick started the third generation of console games and revived the console industry, few people overlooked the fact that Nintendo was a Japanese company.  Nintendo thoroughly dominated the 3rd generation of home video game consoles.  Sega was also a Japanese company, although its console had less impact in the United States and Canada, it still competed with Atari for 2nd place.

If you looked through the credits of most NES games (that had credits), the names would typically be Japanese names.  Of all the great, classic NES games, virtually all came from Japanese developers.  Some of the best known are Shigeru Miyamoto, who created Super Mario Bros. and The Legend of Zelda, Kenji Inafune of Mega Man fame, Hironobu Sakaguchi, original designer of the final Final Fantasy series, Yoshio Sakamoto, designer of Metroid and Kid Icarus, Genyo Takeda for (Mike Tyson's) Punch-Out!! and the Startropics games, and of course no list can be complete without Yuji Hori of Dragon Quest/Warrior renown.

I do not wish to be ignorant by implying that America did not have an important role to play in the third generation, as it most certainly did.  Americans bought millions of systems and games and millions were spent to get them to buy those games.  Success in America transformed the console from a single-country (Japan) success into a global phenomenon, even if it was not as dominant in Europe.  Nor do I ignore the important contributions of several Americans like Howard Phillips, Howard Lincoln, Henk Rogers and (indirectly) John Kirby.  Without them, Nintendo of America may never have been able to make the console a success.

However, when it comes to classic console games of the third generation, virtually none can be traced back to American developers.  What few nuggets did come from the States were ports of well-regarded home computer games.  AD&D Pool of Radiance, Hillsfar & Bard's Tale, Boulder Dash, Raid on Bungeling Bay, King's Quest V, Lemmings, Maniac Mansion, Might and Magic, Pipe Dream, Pirates!, Prince of Persia, Skate or Die!, Ultima III and IV, Wizardry I & II.  Many of these games were good ports but most lost something in translation, or their appeal was lost on NES gamers.

The U.K. developer Rare cannot be overlooked in this article.  Rare(ware) made great original games like Snake, Rattle & Roll, Battletoads and its sequel Battletoads & Double Dragon, the Ultimate Teamup.  It also made the R. C. Pro-Am and Wizards and Warriors series.  Although the latter series is uneven, #3 is quite good.  Their pinball ports, Pinbot and High Speed, are probably the best pinball games on the NES.

While there were several American unlicensed companies that released NES games like Tengen, American Video Entertainment and Color Dreams, Tengen's best titles were ports of games already released for the Famicom (Alien Syndrome, Fantasy Zone, Rolling Thunder, Shinobi) by other companies and the other two were bottom feeders that almost never released good games.  Many of AVE and Color Dreams games were games developed in Taiwan.  Codemasters was  a U.K. company that made at least one great game, Micro Machines, good ports of the Dizzy games (which originated on the U.K. home computers) and demonstrated that they could compete with Nintendo's official licensees.  Camerica distributed Codemasters games in the US and Canada.  There were a few decent games from the unlicensed US NES developers, but if you are looking for classics, look elsewhere/.

Most American designers were commissioned by outfits like LJN and Acclaim to make licensed games.  Virtually all suck.  If I had to list all the crappy licensed games made for the NES, we would be here for a while.  Some of the Star Trek and Star Wars games are okay, but nothing spectacular.  Games based on gameshows like Wheel of Fortune and Jeopardy fulfilled a need, but the individual games are largely forgettable.

Things are not completely hopeless on the U.S front.  One arguable classic from U.S. shores is David Crane's A Boy and his Blob.  I consider this as close to an official David Crane's Pitfall 3 as he ever got.  The graphics were drab, the music repetitive, the controls somewhat loose and the scrolling notable for its absence.  However, the design is first rate, with all the things the blob can do and all the ways you need to do it to solve puzzles and explore the game world.

Regarding the NES's two closest competitors, there were few American original games released for the SMS, and the ports were typically done by Japanese or Europeans and released only in Europe or Brazil.  The 7800 had some great arcade ports, but it had a small library and few original games for the console.  No classics here.

This situation would continue into the 16-bit generation.  The big two consoles, the Genesis and the SNES, still had the bulk of their classics from Japan and Europe.  At least U.S. game developers were starting to take consoles seriously, but it would take at least another generation or two before the U.S. could boast of parity with the Japanese and European developers.  In the fourth generation, we have such lustrous titles and series like Earthworm Jim, Zombies Ate My Neighbors, Super Star Wars, the Lost Vikings, all developed primarily by US developers.  LucasArts never shined on the NES, but on the SNES, it was a different story with the above and games like Metal Warriors.  The Sega Genesis may be a bit more egalitarian than the SNES, but only because Nintendo really just kept hitting the home runs on its 16-bit wonder.  Of course, I could mention all the sports games like Madden and NBA Jam and quality arcade ports of the Mortal Kombat series.

Monday, October 13, 2014

Battery Life in the 8-bit Game Boy Line

When the Game Boy was released in 1989, it was the first portable video game system using interchangeable cartridges.  (While the Microvision had been released in 1979, the games themselves attached to the base and provided controls and CPU as well as program code).  In the palms of the player's hands they had much of the power of the NES.  However, its rivals the Atari Lynx, Sega Game Gear & Nomad and the NEC Turbo Express, could have easily eclipsed it with their color screens.

The Game Boy had two huge advantages over its rivals.  First, it came with the killer-app pack-in, Tetris.  Second, it had far superior battery life to any of its rivals.  In this post, I will discuss battery life among the four members of the 8-bit Game Boy line, the original DMG Game Boy, the Game Boy Pocket, the Game Boy Light and the Game Boy Color.

1.  Game Boy DMG-01

The DMG-01 takes four AA (LR6) batteries and there was an official Rechargeable Battery Pack, DMG-03, available at launch, that could provide portable or AC power.  Regular Alkaline AA batteries are rated to provide a nominal 1.5 volts and 1800-2400 milli-amperes per hour (1A = 1,000mA) depending on the energy drain of the powered device.

The DMG doesn't tell you directly everything you need to know about its power requirements.  On the back of the DMG, the text states that the DMG is rated for 6 volts and 0.7 watts.  If you look in the Game Boy Owner's Manual, (p.12) you will see that this is not the maximum power consumption for the device, just the approximate usage.  Power consumption depends on what game is used and what it is doing.  The manual gives approximately 15 hours on 4xAA, but I have seen other estimates of 35 hours.

Four out of five of the launch titles for the DMG, Alleyway, Baseball, Tennis, Tetris would have required fairly little power.   These small (32-64KB) games only tend to animate a small portion of the screen, leave lots of undrawn "white space", do not use extra RAM in the cartridge, are often silent or do not always have music playing and rarely scroll the screen.  The fifth launch title, Super Mario Land, is a substantially more complex game and would have a greater power draw.  Larger (128-512KB) and more complex games after these launch titles would almost certainly draw more.

Back to our DMG, we need to determine the amperage the device requires.  Fortunately the relationship between volts, amps and watts is simple :

W = V x A

Dividing the wattage, .7, by the voltage, 6, we get .11666A, or 116.66mA.  If we look at the rechargeable battery pack specs, we see that it provides 150mA, confirming the ampere requirements for the DMG.

The DMG and its successors connect its batteries in series so that the output voltage is the sum of the output voltage of each individual battery.  So four 1.5v AA batteries will give a voltage of 6v.  Unfortunately, the mAh available to the Game Boy does not increase with extra batteries.  If the batteries were connected in parallel, it would increase but the voltage available would only be 1.5v, which is nowhere near sufficient to drive the device.  Thus you get a tradeoff, either you increase the voltage or the current that can be provided, but not both.  

The rechargeable battery pack also tells us that it provides 4.8v to the Game Boy.  Rechargeable AA batteries like NiCd and NiMH batteries provide a nominal 1.2v per cell.  NiMH was just coming on the market in 1989, and the rechargeable battery pack used NiCd batteries. However, the Game Boy is fairly tolerant of the variance between 6v and 4.8v, probably because it uses 5v logic.  Besides, depending on the quality of the Alkalines being used, that 1.5v per cell may be very nominal indeed.  Moreover, the voltage of an alkaline declines over time, whereas a modern NiMH battery's voltage remains much more constant until it reaches the point of discharge.

Now we come to the issue of mAh.  Consider the following datasheet :

http://data.energizer.com/PDFs/E91.pdf

As we have determined, the Game Boy requires an average of 116.66mA to operate.  According to the Milliamp-Hours Capacity, at that amperage requirement the battery can provide approximately 2400mAh.  If we divide the mA by the mAh, we get 20.57 hours.  Nintendo's estimate may have been a bit conservative here, but they could have been thinking ahead for the more complex games to come.

Nintendo was not only introducing a new video game console, it was introducing a new video game concept. It had to convince buyers that they should buy an expensive hand-held video game machine and its cartridges.  It also had to show that the simple games from Tiger Electronics simply were not good enough.  First impressions counted a great deal, and Nintendo could not afford to fudge the battery life figures too much.  This was especially true because of how crucial battery life was to the hand-held video game market.  Nintendo's success rested in no small part on its battery life.  You could get 15-20 hours out of a Game Boy on a fresh 4-pack of batteries.  Its competitors required 6 batteries and could give you six hours at best.

2.  Game Boy Pocket MGB-001

The Pocket was the second iteration of the Game Boy line, released in 1996.  This was a comparatively slimmer device, as its name implies.  The Pocket takes 2xAAA (LR03) batteries and has power requirements of 3v and 0.7W.  Thus, although the Pocket's logic may require fewer volts to operate, it requires double the amps, 233.33mA.  Therefore the actual power to operate the Pocket is unchanged from the DMG.

The official Game Boy Pocket A/C Adapter from Nintendo, MGB-005, outputs 3v and 300mA.  A similar third-party adapter from Hori outputs 350mA.  The Pocket A/C Adapters are to be used with the Game Boy Light and Color.  In Japan there was a rechargeable battery pack for the Pocket.

The use of AAA batteries kills the battery life of this machine.  An Alkaline AAA battery has the same voltage as an AA battery, 1.5, but only provides 850-1200mAh.  There is only about half the energy available to the Pocket as there is to the DMG.  I have seen quotes of battery life of 8-10 hours for the Pocket.

If we take the datasheet here as a guide :

http://data.energizer.com/PDFs/E92.pdf

We can see that at 233.33mA, we are only going to get about 700mAh out of our good AAAs.  This gives us a pathetic 3 hours.  Perhaps Nintendo was measuring it against the titles that were available in 1994-1995, such as Kirby's Dream Land 2 and Donkey Kong.  The strict approximation doesn't seem to hew to the reported battery life, which demonstrates that the Nintendo or the battery makers were treating the issue of battery life very conservatively.

3.  Game Boy Light MGB-101

The Game Boy Light, released only in Japan, functions like the Game Boy Pocket with a switch to activate an electro-luminescent backlight.  The Light uses 2xAA batteries and boasts 20 hours of play without the backlight and 12 hours with it on.  The power requirements have also decreased slightly to 3v, 0.6w.  Thus it requires an average of 200mA to run.

According to the datasheet, at 200mA we have approximately 2000mAh.  If we divide the mA by the mAh, we get about 10 hours on a pair of AAs.  One hopes that the stated power requirements were taking the backlight into consideration.

4.  Game Boy Color CGB-001

The Color has the specs of the Light without the backlight.  I have seen quotes of battery life of 20-35 hours.

Now the Color has the same power ratings as the Light, but this time it has a color screen, three times the RAM and a CPU that can run twice as fast as the Light, Pocket and DMG.  The games themselves are typically larger, from 1-4MB.  I suspect that the battery life is more impressive if it runs monochrome Game Boy games than if it is running Color Game Boy games because those extra features are not being used.

Compared to the original DMG, the Color seems to have less life.  However, the Color can run on 2 AAs whereas the DMG requires 4.  I would say that with 4 AA batteries (meaning you need to replace the batteries once), you can probably get the same amount of playtime as you would with a DMG.

The videos here may be very instructive :

https://www.youtube.com/watch?v=XsU4AcYhjy8

https://www.youtube.com/watch?v=VgKdEa06qUs

The video maker in his first video gives a battery life of 31hrs 12mins for a DMG and in the second video 35hrs 45mins for a Color.  In the later video, the relatively short time for the Game Boy is because one of his children turned it off prematurely.  However, both systems were running monochrome Game Boy games, and I cannot tell for certain what game was in the DMG, but it appears both videos used the same game in the DMG.  I think it is Super Mario Land.  (For the Color it was Top Rank(ing) Tennis).  Super Mario Land has an attract mode, but Top Ranking Tennis has animation and music on its title screen, so the cartridges seem pretty fair.  However, if a true Color game were being played, I would certainly think that the time would be significantly shorter.

Saturday, October 11, 2014

Directional Difficulties - The Early Keyboards and Cursor Keys

When IBM introduced the PC, it came with an 83-key keyboard keyboard that a number row and a numeric keypad.  There were no status LEDs on this keyboard, so the only way you could tell whether the Num Lock key had been pressed was by observing the behavior of the numeric keypad.  If a number was typed, then the Num Lock was on.  The general layout was as follows :


All layouts taken from here : http://www.quadibloc.com/comp/kyb03.htm.  There were also separate + and - keys and a PrtSc * key.  Not every game used the numberpad for directional controls.  

For the IBM PCjr., IBM severely cut down the keyboard size, build quality and number of keys.  There was no numeric keypad.  Instead, the keyboard only had six discrete cursor keys.  Here is the new layout :

The cursor keys pull double and even triple duty, as their function changes  if the Shift or Fn key is held down.  There is no Num Lock key on this keyboard.

The Num Lock key can be "pressed" by hitting Alt, Fn and N.  When the Num Lock function is activated in this manner or the Shift key is pressed, then Up becomes 8, Left becomes 4, Right becomes 6, Down becomes 2, Ins becomes 0 and Del becomes .  If the Fn key is held, then you get Home, Pg Up, Pg Dn and End for Up, Left, Right and Down, respectively.   Press Fn and Shift, and you get 7, 9, 3 and 1.  Numberpad key 5 cannot be directly generated by the PCjr. keyboard.

The next major keyboard innovation came from Tandy.  Tandy 2000 and more importantly 1000 keyboards have separate cursor control keys in the now familiar inverted-T layout.  In addition, there is a numeric keypad, but several functions have been changed.  There are individual keys for Home, Insert and Delete. Here is the layout :


There are more differences between an IBM and a Tandy keyboard as well.  However, the differences do not always make a difference to programs.  There are two general methods with PCs to determine which key was pressed.  The first was to call Int 16h.  The result would give you a translated scan code and an ASCII character.  The second was to read the raw scancode directly from the hardware.  Some programmers used the second method with their own keyboard interrupt handlers.  This tends to be the cause of keyboard incompatibilities.

Because some keys, like the numberpad keys, can give results identical to other keys on the keyboard, even the BIOS allows you to distinguish between the 1 key on the number row and the 1 key on the number paid.  You can tell the difference between the Left and Right Shift keys, even though their function is totally identical.

A Tandy has a Num Lock key and even a status LED, but when the Tandy boots up, the Num Lock defaults to off, just like the PCjr.  An IBM PC defaults the Num Lock function to on.  Many games require you to turn the Num Lock on when running on a Tandy 1000.  This is because the characters given by the Tandy keyboard are often not the same as on an IBM PC keyboard.  However, for numbers they will always be the same.  

The Tandy inverted T cursor keys are another issue.  A well-behaved program doesn't care which key is pressed so long as it reads the scancode it expects.  However, not every DOS game is well-behaved.  In DOS, the separate cursor keys function as they would on an IBM Model M keyboard.  However, some games rely on the numeric keypad to give eight movement directions.  Tandy's inverted-T cursor keys give different raw scancodes and may not always be recognized.  

Later Keyboards :

The 83-key keyboard layout was followed for the PC AT keyboard with a few differences to key placement and size.  IBM included status LEDs and an 84th key for Sys Req.  The raw scancodes are completely different from an 83-key keyboard, only the BIOS allows for compatibility with PC and XT software.  However, despite the fewer number of keys compared to more modern keyboards, it is still usable in any system with a PS/2 port.  

Finally, IBM released the Model M 101-key keyboard which essentially defined the minimum number of keys and the basic layout that we use today.  Its provided fully separate cursor keys in addition to the numeric keypad.  Most of the time, the cursor keys can be used as directionals, but because they have different raw scancodes than the numeric keypad cursor keys, some games will not recognize them.  The Model M supports three sets of raw scancodes, Set 1 is the PC/XT scancodes and it sends those scancodes when it is plugged into a PC or XT or Tandy 1000 TL/SL/RL or the 8086 based IBM PS/2s (but compatibility with anything other than the PC/XT's 2nd or 3rd BIOS is dicey).  Set 2 is when it is plugged into an IBM PC AT, PC/XT Model 286 and just about every other computer, including modern machines. Set 3 was intended as the native PS/2 scancode set and is similar to Set 2 but was rarely used.