Thursday, February 20, 2014

Monochrome & Hercules Graphics Aspect Ratio and Scaling

The IBM Monochrome Display and Printer Adapter output 80-column text with a 9x14 cell size.  This gives 720x350 pixels.  The Hercules Graphics Card is a clone which adds a 720x348 graphics mode.  The aspect ratio of the graphics mode, with perfectly square pixels, is 2.07 : 1.  However, the IBM Personal Computer (Monochrome) Display 5151 has a less horizontally rectangular tube that measures about 9.5 inches by 6.5 inches from one edge of the screen to the other.  The diagonal display measures about 11.5 inches.  This would give an aspect ratio of 1.46 : 1.

The active display area does not reach the edges of the monitor.  I measure it to be about 8.75 inches by 5.5 inches.  This gives an aspect ratio of 1.59 : 1.  The graphics mode loses two lines and thus the aspect ratio is a sliver wider.  Coincidentally, this is the square pixel ratio of CGA 320x200. There are no horizontal or vertical size or hold adjustment knobs on the monitor, only brightness and contrast.  Here is a screenshot showing, somewhat faintly, the visible screen area on a 5151 :


DOSBox can take screenshots of the Hercules Graphics mode.  Here is one such screenshot, untouched : 


While it is a bit squashed, doubling the vertical resolution (720x696), as some Mobygames screenshots do, is just not appropriate.  If you do that, you will have an aspect ratio of 1.03 :1.  As you can see from the image of the real monitor, the visible screen area is not a nearly-perfect square or anything near it.  

While it is not perfect, the best compromise is to increase the vertical size of a screenshot by 25% using nearest neighbor interpolation.  If you resize the screenshot to 720x435, you get this result :


This gives a 1.66 : 1 aspect ratio, which is far, far closer to the ideal ratio while keeping upscaling artifacts to a minimum.  

Starflight's effective resolution is 160x200, which is fairly common with older games.  If you use a game that has a native 320x200 resolution, the artifacts can be a little more visible : 

Maniac Mansion Enhanced Version - Original
Maniac Mansion Enhanced Version - Resized
Leisure Suit Larry 3 - Original
Leisure Suit Larry 3 - Resized
One issue to note is that most PC games use a native 320x200 resolution, and their Hercules drivers often leave noticeably large borders.  Many, if not most games use double the horizontal resolution to 640 pixels, using an algorithm similar to what they would use for 640x200 CGA graphics.  Starflight's effective resolution with Hercules is 640x200.  The regular 16-color resolution of Maniac Mansion's graphics window is 320x128, so with Hercules they simply doubled it to 640x256.  The text size remains 8x8, so there is an unused section at the bottom of the frame.  Sierra did something similar with their AGI games.  Their graphics window is 320x168, so with Hercules they doubled that to 640x336 and used the extra 12 lines for the status bar.  Instead of keeping the 8x8 font, they used an 8x12 font unique to the Hercules driver.  Typing pauses the action like SCI games, whereas it does not in all other graphics modes.

For Leisure Suit Larry 3 and other SCI0 games, the native graphics area is 320x190 in 16-color modes with the status bar taking up the remaining 10 lines. They could not double up on the graphics because they only have 348 lines to use.  What Sierra did here is to increase the horizontal resolution of the whole screen to 640 and the vertical resolution to 300, effecting a 150% increase in the vertical resolution (including the status bar).  Every other line is repeated.  This may not give the nicest look, this was probably the simplest approach to take, which was important when dealing with taxed 8086 and 286 machines.  Also, there is is no way to decrease the brightness of each individual lit pixel, so traditional filtering techniques will not work.

Here are a few more screenshots showing how non-native Hercules games fit within the screen :


Good Bits

Hex nut driver bits can be very useful for opening up vintage PCs and not quite so vintage, especially those made by IBM.  Here are some bits and the screws they can more easily unscrew in most instances than a standard slotted screwdriver.

3/16" - Expansion card retention screws for IBM PC, XT and probably the AT, XT/286 and Portable, Expansion card retention screws for the Tandy 1000/A/HD/SX.  Drive mount and system board retention screws for IBM PC & XT, probably others.

7/32" - IBM Model M Keyboard screws, probably Unicomp Keyboards as well.  Needs a long barrel bit to fit inside the three of the four holes for the screws.

1/4"- External case screws for the IBM PC, XT and probably the AT, XT/286 and Portable, Internal case screws for Tandy 1000s.  IBM Model F PC and probably AT screws.  System board screws for Tandy 1000s.  Floppy disk drive mounting screws for IBM PCjr.

Later, more generic PC cases can still use the 1/4" and 3/16" bits, even though they have Phillips-screw heads, as they are still using hex heads.  Sometimes in-between bits like 5mm and 6mm can also come in handy, the former especially when trying to screw in port standoffs.  

Sunday, February 16, 2014

Patching DOSBox by a Beginner for Beginners

In order to apply a patch to DOSBox, you must first be able to compile DOSBox from its source.  Start with this tutorial :

http://www.dosbox.com/wiki/Building_DOSBox_with_Visual_C_2008_Express

The link for Visual C++ 2008 Express given in that tutorial is out of date, you can obtain the downloader from here :

http://go.microsoft.com/?linkid=7729279

When you can compile a binary using the current SVN, then you are ready to begin patching DOSBox.

Patching DOSBox means you are making changes in the existing source code and recompiling DOSBox with those changes into a new binary.  First you need a copy of the source code you are modifying.  DOSBox is written in C++ and the source code is in almost plain text.  You can find the latest source here : http://source.dosbox.com/dosboxsvn.tgz.  Decompress it with a program like 7zip (it is doubly compressed), and look at the files.  The .cpp files contain most of the code you may be modifying.  

Next you need a good text editor, preferably one that supports line numbers.  Notepad just does not support enough of the formatting these files need.  Wordpad does, but you would do better with an editor like EditPad Lite 7, which supports line numbering.  Line numbering is very useful to determine which lines of code you need to modify.  

Finally, you need a patch file.  Patch files often use the .diff extension because they show the differences between two files or two sets of files.  If the patch is just code posted in a forum, you should copy and paste it into a new file opened in Wordpad or EditPad or something similar.  Maintaining the spacing in these files is important.  

Here is a sample patch file against the current DOSBox SVN (r3858) :  

--- adlib.cpp.old   2013-01-15 12:10:04 +0000
+++ adlib.cpp   2014-01-19 19:54:06 +0000
@@ -227,10 +227,10 @@
       Bitu i, val;
       /* Check the registers to add */
       for (i=0;i<256 font="" i="">
-         //Skip the note on entries
-         if (i>=0xb0 && i<=0xb8) 
-            continue;
          val = (*cache)[ i ];
+         //Silence the note on entries
+         if (i>=0xb0 && i<=0xb8) 
+            val &= ~0x20;
          if (val) {
             AddWrite( i, val );
          }

The first two lines identify the source file that was modified, in this case adlib.cpp.  Find and open adlib.cpp using your text editor in the DOSBox source directory.  It can be found in \dosbox\src\hardware.  This is what the existing source code looks like :

Bitu i, val;
/* Check the registers to add */
for (i=0;i<256 font="" i="">
//Skip the note on entries
if (i>=0xb0 && i<=0xb8) 
continue;
val = (*cache)[ i ];
if (val) {
AddWrite( i, val );
}

The next line in the patch file, @@ -227,10 +227,10 @@ pinpoints the lines in adlib.cpp that were modified.  Look for line 227 in the source code file or search   Sometimes, depending on the patcher's working source, the line number may not line up exactly with the DOSBox source, but it should be very close to the line.  Sometimes code looks similar, if you are unsure whether you have the right code, then copy as much of the code from the patch file as you can into a find box and search the source code file until you are sure you have the right lines.  

The lines with blank space in front of them show the existing code that will not be modified.  This is important to know where you will begin to modify and where you will end.  Lines beginning a - indicate that that line was deleted by the patch.  Conversely, lines beginning with a + indicate that that line was added by the patch.  From our example above, these lines were deleted : 

-         //Skip the note on entries
-         if (i>=0xb0 && i<=0xb8) 
-            continue;

In the original source file, highlight and delete them.  Remove the lines entirely so the code looks like this :

       Bitu i, val;
       /* Check the registers to add */
       for (i=0;i<256 font="" i="">
          val = (*cache)[ i ];

Now add these lines after val = (*cache)[ i ]; :

          //Silence the note on entries
          if (i>=0xb0 && i<=0xb8) 
             val &= ~0x20;

Copying and pasting usually gives better results than retyping.  Make sure the code fits where it is indicated and does not overwrite any lines without a - in front of them.  Also make sure, since your text editor must be using a fixed-width font, that the lines line up vertically as shown in the patch.  Do not forget the { and }.  The + characters also should be removed, and add an extra space to the line to preserve the code's position on the line.  Here is the code as it should look in the patched adlib.cpp file :

       Bitu i, val;
       /* Check the registers to add */
       for (i=0;i<256 font="" i="">
          val = (*cache)[ i ];
          //Silence the note on entries
          if (i>=0xb0 && i<=0xb8) 
             val &= ~0x20;
          if (val) {
             AddWrite( i, val );
          }

Once you are done, save the modified .cpp file.  There may be more than one place in the .cpp file to patch, so go to the next line indicator, which looks like @@ -227,10 +227,10 @@ and continue patching. .diff files can include more than one source code file to patch, so make sure you patch all source code files indicated by the .diff.  

Go back into Visual C++ 2008 Express Edition, open the DOSBox solution, and build a new binary.  If you have previously built a binary, then it will not take long as only the changes made by the patch need to be recompiled.  

While there are utilities that can do this for you, I have never gotten one to work properly and sometimes the line numbers do not match and you need to manually patch the code.  

More complex patches may require substantial modifications to the code, or may also require adding completely new code files.  They may also require new libraries and includes files, which are beyond the scope of this tutorial.  

Influences of the PCjr. - the IBM PC Convertible

The IBM PC Convertible, Model 5140, was IBM's first attempt at a battery-powered laptop.  Of course, it was thick, had a small screen, and expansions made it longer.  However, it does share more than a few similarities with an earlier of the PC family, the IBM PCjr.  While it took ideas from the PCjr. and improved on them in many respects, the system was not a great success due to its own issues, namely its high price and less-than impressive specifications compared with competitor's products of the time.  The introduction of the 3.5" disk drive on this system, when all software had previously been released on 5.25" disks, meant that it took time for the market to release PC compatible software for the machine.  Also, if the chicklet keyboard was the Achilles Heel of the PCjr, the Convertible's initial low-contrast LCD gave it a bad reputation.  Later machines used a super twist LCD and a backlit LCD, both offering much improved readability, but like the PCjr., it was too little, too late.

Keyboard - The original IBM PC Keyboard used 83 keys.  The PCjr. Cordless Keyboards use 62 keys and the PC Convertible uses 78 keys (U.S. style).  The fewer keys make handling these keyboards with low-level routines quite different from the IBM PC keyboard.  Both the PC Convertible and the PCjr. use the Non-Maskable Interrupt to generate IBM PC Keyboard compatible scan codes.

In an IBM PC, serial data from the keyboard is sent to the system unit, deserialized by a shift register and then placed in I/O port 60, the 8255 PPI Port A0.  IRQ1 is used to signal the CPU that there is a key to be read.  A program can read the raw scancode directly or execute INT 09H/INT16H to obtain an extended ASCII scancode.

In the IBM PCjr., serial data sent from the keyboard is sent to bit 6 of I/O Port 62, 8255 PPI Port C0.   The NMI is generated to alter the CPU that there is a key to be serviced and the CPU deserializes the data stream, then INT 48H is executed to translate the raw scancode into codes compatible with INT 09H/INT16H.  IRQ1 is never used, but the translated scancodes appear at I/O port 60.

In the PC Convertible, the raw scancode is placed in I/O Port 07D.  An NMI is generated and the NMI handler will translate the raw scancode into a compatible scancode and stores the result in I/O Port 60 and generates IRQ1 and the key can be read with INT 09H/INT16H.  While obviously derived from the PCjr., this is an obvious improvement over the PCjr.'s slow routine and should be much more compatible with programs expecting PC keyboard handling.

Memory Expansion - Neither the PC Convertible nor the PCjr. were intended by IBM to reach 640KB, both were intended to max out with 512KB.  Memory expansions for both machines came in 128KB.  IBM officially only supported the Memory Expansions for the PCjr. (128KB in system unit + 3 x 128KB expansions), but the fourth expansion was easy enough to add.  IBM only physically supported four memory modules in the PC Convertible, each with 128KB, and the system always came with two installed from the factory.  Third party expansions were required for the PC Convertible to reach 640KB and recommended for the PCjr. to reach 640KB.

Feature Expansion - Both machines were expanded by hardware attachments, the PCjr. via sidecars that fit onto a connector on the right side of the machine, the PC Convertible by a connector on the rear of the machine.  IBM released five PCjr. attachment options, parallel, power, memory, speech and cluster, and four for the PC Convertible, serial/parallel, CRT display, speech and portable printer.  If customers did not particularly care for adding onto the length of the PCjr. they must have positively detested the added weight and length that the add-ons for the Convertible added.

Modem - IBM included a modem slot in the PCjr.  It sold a modem based on the Novation Smart 103 modem for the PCjr, which could run at 110 or 300 baud.  It did not sell well because it was not Hayes compatible.  IBM also included an internal modem socket in the PC Convertible.  Apparently ignoring the market again, IBM used the same style of modem for the PC Convertible internal modem upgrade.  This time the modem could also support 1200 baud.

The COM ports were similarly assigned on both systems.  The PCjr. had a serial port built in and it was assigned to COM1, but the resources were at 278/03.  Once the modem was installed, the serial port became COM2 and the modem COM1 at 3F8/04.  The PC Convertible Internal Modem always used 3F8/04 and would be assigned to COM1 when it was installed.  This time, IBM knew enough that not everyone would install the internal modem, so the PC Convertible had a serial adapter that could be set to COM1 3F8/04 if no internal modem was installed or COM2 2F8/03 if it was

CGA Support - The PCjr. had only basic, BIOS CGA support since it did not implement the crucial Color Select and Mode Control registers.  Although the PC Convertible uses a CGA-friendly 640x200 LCD resolution, the built in video is not particularly CGA compatible either.  Color text-mode attributes were not supported on the monochromeLCD, it was either normal video, reverse video or no display.  320x200 graphics would display three shades of gray plus black, but the graphics take up the whole screen, meaning they are twice as wide as they should be.   The built in LCD does not distinguish between 640x200 and 320x200 in this instance.  The MC6845 was only emulated enough for the basic modes, the color select register is not present and the mode control register has missing bits compared to real CGA.

The built-in display adapter can also be configured to emulate a MDA card.  When the CRT Display adapter is attached to the PC Convertible, it will function like an MDA card and the CRT Display adapter should provide 100% CGA compatibility.  The Display adapter has three video output ports, a Direct Drive port using an 18-pin BERG connector with pinouts identical to the PCjr's Direct Drive video port (except no audio).  The adapter can connect directly to the PCjr. Color Display, Model 4863 or the PC Convertible Color Display, Model 5145.  It can connect to an IBM PC Color Display, Model 5153 or IBM PC Enhanced Color Display, Model 5154 or any other compatible display via the PCjr. 18-BERG to 9-pin DE-9 adapter.  It also has a composite video output like the PCjr. and a 6-pin BERG connector for an RF adapter.  The BERG connector has a compatible pinout with the PCjr. RF switch.

Printer - Both systems had a printer designed specifically for it, the IBM PC Compact Printer for the PCjr. and the IBM Portable Printer for the PC Convertible.  Both are unidirectional thermal serial printers operating at a maximum of 1200 baud and have a 2K buffer.  Both use a transmission format of 1 start bit, 8 data bits and 2 stop bits.  The Convertible's character set includes text-drawing characters at ASCII 176-223 which the Compact Printer does not.  The PC Compact Printer can print in standard, condensed, double-wide and underline styles and 480-bit graphics, while the Portable Printer adds emphasized, superscript and subscript styles and 960 and 1920 bit graphic modes.  The Portable Printer supports virtually all the control codes of the Compact Printer plus some more for its enhanced features.

Speech Attachment - The Convertible's Speech Attachment is supposed to be functionally identical to the PCjr's.

Saturday, February 8, 2014

Introduction to the PCjr., or How NOT to Destroy It!

IBM PCjr. Startup Screen - Maximum RAM Count (but you can have more)
Congratulations!  You have just won a PCjr off ebay, scored one off craigslist, took one from the recycling center or was given one by Uncle and Aunt Lots-o'-Stuff in the Attic.  Its just arrived, you open the box, unwrap all the pieces, now what do you do with it?

First Things First : To use a PCjr., you need, at a minimum the system unit, the keyboard and the power cable.  If you are missing any one of these three, the PCjr. is useless.  I am going to go through each in terms of simple to complex :

The External Power Adapter: This is a large black power converter.  It has wires on either end.  One the end of one wire is a three-pronged plug.  On the other end is a rectangular three pin connector that connects to the back of the system unit.  The port is in between the A and the C ports.  On early bricks, the cable with the three-pronged plug is detachable from the large brick.  A standard three-pronged computer power cable should fit into the brick.  The brick only supports 120v/60Hz AC power, so in Europe you will need a step-down converter.  It outputs AC power, the AC to DC conversion is done inside the system unit.  The power cable can fit into the system either way (polarity is irrelevant for AC).

The Cordless Keyboard : The original Cordless Keyboard, later known by everybody, even IBM as the "chicklet" keyboard is the less common of the two IBM PCjr. Cordless Keyboards, especially after IBM offered a free trade in to the non-chicklet keyboard.  IBM called the replacement keyboard the "Freeboard", presumably because it offered some freedom from the frustration of the chicklet and was a free replacement for PCjr. owners who hated the chicklet keyboard.  Internally, they function identically.

The PCjr. Cordless Keyboards use rubber-dome technology and can feel stiff yet squishy.  The keyboard communicates with the system via an infrared sensor or via an optional keyboard cable.  It takes 4 x AA batteries, and you should check the battery compartment to see if there are old corroded batteries.  If there are, you should clean the contacts with cotton swabs or Q-tips with apple cider vinegar or lemon juice and follow it up with baking soda.  You may need to unscrew the board to inspect for leakage on the PCB.  The infrared can work up to twenty feet away according to IBM, but line of sight must be maintained and the sensor on the keyboard should be as perpendicular as possible to the sensor on the computer.  Rechargeable batteries may or may not provide reliable power for the keyboard.

The System Unit : The computer is inside on a large system board.  Most PCjr's you will find these days are the Enhanced Model, which come with a 5.25" diskette (floppy disk) drive and a 64KB memory expansion.  These have 128KB of RAM total, not counting any extra memory added via sidecar.  The Basic Model did not come with a diskette drive or the 64KB memory expansion.  If you are getting a boxed unit, it should come with all the above and two books, the first being the PCjr. Guide to Operations and the second being the "Hands On BASIC for the IBM PCjr."  A complete unit should also come with a plastic plate to cover the sidecar expansion and a Basic Model also comes with a plastic cutout to cover the floppy bay hole.

Checking for damage : The expansion ports on the rear of the PCjr. use BERG-style connectors, which little more than pins bent at right angles sticking out from the system board.  These are more prone to damage than connectors set in a D-shell, but it was cheaper for IBM to implement them in this way.  Check for any bent, broken or pushed in pins.  Most of the connectors have a missing "key pin", so check below to discover pins that are supposed to be missing.  Gently straighten or pull out any pins with a small pair of pliers or tweezers.  Expansion cables are held in the port by friction alone, so do not try yanking cables out. Similarly, the sidecar expansion port also uses pins, but at least these are cased in a plastic connector like an IDE port.

Opening the case : The case top is held down by friction and tabs, there are no screws to deal with.  Using a small screwdriver, insert it into each of the three indentations at top rear edge and gently pop that portion of the case off.

Inside the case : There are up to four internal expansion boards.  Fortunately each can only fit one way.  There are no jumpers or dipswitches inside or on the internal expansion board.  IBM did not use jumpers (officially) on its sidecar expansion board either.  Everything is configured in software, which was rather progressive for the time and technology.  If you want a true definition of plug and play, here it is!

On the left side of the unit (with the cartridge ports facing you), is the power board, which is always present.  The power board comes in either a 33W short card or a 45W long card.  If the power card is about 2/3rds the length of the case, it is the short card.  If it extends nearly to the front of the case, it is the long card.  There is a 2-pin staking connector which the power board must be inserted into when it is put back in its slot.  There are grooves in the case to stabilize the card, make sure the card fits into them.

The second board is the 64KB Memory and Display Option.  As its name suggests, this adds 64KB to the 64KB on the motherboard for a total of 128KB inside the System Unit.  Early memory boards are covered in a metal shield, later boards are just a bare PCB.  If this board is not present, you will only have 64KB of RAM in the system and a big hole if any sidecar memory expansions exist.

The third board is the PCjr. Internal Modem Option, and as it was always an optional upgrade, it probably won't be present in your average PCjr. System Unit.  IBM's modem was not very popular since it only communicated at 300 baud and did not use the industry standard Hayes command set.  Third party Hayes-compatible modems were also made to fit in this slot.  Like the power board, this card connects to a 2-pin staking connector and grooves in addition to its slot.  This is the only internal upgrade not to come automatically bundled with the PCjr. System Unit.

The fourth board is the PCjr. Diskette Adapter.  This connects to the Diskette Drive via a 34-pin ribbon cable with a pin header on one end and a card edge connector on the other.  It only supports the one internal drive.  Note the side of the cable with the colored wire, that side must correspond to pin 1 on the board if the diskette drive is going to work properly.  Pin 5 is missing on the adapter pin header as a key pin to prevent wrongful insertion.

The diskette drive is mounted on a unique plastic drive support.  It is connected to the board by two standoffs that push through the bottom of the case.  To remove the drive support mechanism (and the drive itself), first unplug the cables for the diskette drive power connector and the fan power connector from the power board.  Next, disconnect the drive data cable.  Next, with a pair of pliers, squeeze the tabs in and push upwards on the standoffs until the constrict and pop up from the bottom of the case.  These are not screws, so do not twist a screwdriver in them.  Finally, pull up on the back of the diskette drive and it should be able to be lifted out of the system with no further difficulty.

If you have removed all the internal boards and the diskette drive support, you will have complete access to the interior of the PCjr.  Check for any signs of damage and be prepared to dust.  There is a raised metal box on a small PCB, that is the Infrared Receiver.  Make sure it is firmly seated on its slot.  The receiver is connected to the System Unit by its connector and two plastic standoffs, so you won't be able to remove it without removing the System Unit itself.  The System Unit can be removed from the case by unscrewing four screws at the rear of the system, at least one screw holding down the cartridge ports and removing whatever sidecars are attached.

Rear Expansion Ports :

Except for the RCA ports for video and audio and the modem port (if one is installed), there is nothing standard about the PCjr.'s expansion ports.  However, the hardware that the PCjr. is designed to connect to is standard with one exception.  Looking at the rear of the machine, the ports are lettered as follows :

J   J   L   K   LP    T             V      M   D         S        C      P    A

J = Joystick - There are two joystick ports in the PCjr., with the first port,  sometimes called the right joystick being closest to the edge of the System Unit.  The inner port is sometimes called the left joystick.  These connect to the PCjr. Joystick, which functions just like a standard PC joystick.  The PCjr. joystick just uses a different connector.  River Raid, Demon Attack and Microsurgeon will not work without a joystick connected.  8-pins, with Pin 1 missing as the key pin.

L = Spare - These pins are not connected to anything on the system board. 6-pins, with pin 4 missing as the key pin.

K = Keyboard - For the optional Keyboard Connector.  The keyboard connector has a phone jack on one end and a large RFI ferrite choke.  It plugs into the PCjr. keyboard and allows you to use the keyboard without IR and batteries.  Third party keyboard replacements also plug into this port, but must be specifically designed for the PCjr.  If there is anything plugged into this port, then the system unit will not receive the input from the IR receiver, even if its just an unconnected wire.  6-pins, with pin 1 missing as the key pin.

LP =  Light Pen - IBM never marketed a light pen with a PCjr. style connector, but PC Enterprises did.  6-pins with pin 6 missing as the key pin.

T = Television - For the TV Connector, an RF switchbox to connect to an antenna screw terminal on a TV.  You may need a 300 to 75 Ohm balun connector.  External Audio can be heard from this connector. 6-pins, with pin 2 missing as the key pin.

M = Modem - A standard RJ-11 phone jack connector will be found here if you have an internal modem installed, otherwise it is just a hole.

V = Video - RCA Composite Video jack, better than RF, but not as sharp as :

D = Direct Drive Video - This connector supplies a CGA-compatible video signal and a mono audio signal.  The standard IBM PC Color Display Model 5153 or IBM Enhanced Color Display Model 5154 or compatible monitors can connect to it via a 9-pin adapter.  IBM released one because its PCjr. Color Display was not available at launch.  The IBM PCjr. Color Display Model 4863 has a connector that plugs directly into this port.  The IBM PCjr. Color Display has a built-in speaker with a volume control wheel for the external audio output.  The IBM PC Convertible Color Display Model 5145 also uses the same connector as the PCjr. Color display, but may or may not have a speaker for the external audio.  18-pins.  An adapter exists to allow the PCjr. and Convertible displays to work with a 9-pin D-shell port.

S = Serial - Any serial device can use this port with a proper adapter, such as from IBM.  The only device I know of that has the connector for this port is the IBM PC Compact Printer.  An adapter exists to allow the Compact Printer to be used with a standard serial port.  16-pins.

C = Cassette - IBM made a cable to interface with cassette drives and cassettes for data storage and retrieval.  It has two mini-jacks and one micro-jack.  The cassette interface is functionally identical to the interface in the IBM PC Model 5150.  8-pins, with pin 5 missing as the key pin.

P = Power Connector - See above

A = Audio - RCA Mono Audio Jack, necessary to hear sounds from the external audio unless you are using the TV Connector or the 4863 PCjr. Color Display.

Cartridge Ports :

On the front of the machine, there are two cartridge slots.  These slots are functionally identical.  Like any cartridge slot, they can accumulate dust and should be cleaned with a Q-tip and 99% Isophropyl Alcohol.  The most common cartridge that can be found is the BASIC cartridge (IBM Cartridge BASIC).  This cartridge is intended to supplement the Cassette BASIC already in the system ROM and add support for the advanced sound and video capabilities of the PCjr. and diskette drive support.  Game cartridges are generally rare, especially the good ones from Activision and Imagic.  Lotus 1-2-3 is a rare example of a cartridge program with a cartridge for both slots.

Sidecar Port :

On the side of the PCjr., there is the expansion port of the system, the sidecar port.  If there are no sidecars installed, there may be a plastic faceplate, which snaps into two holes and can be easily pried off with a screw driver or fingers.  Sidecars are pushed onto the pins, then screwed into system unit or the next sidecar with a flat head screwdriver.  You can extend the length of your system quite considerably with expansion sidecars.

Most PCjr.s have at least an IBM Parallel Printer sidecar attached, as the PCjr. did not provide a parallel port in the system unit.  The Printer sidecar provides one unidirectional parallel port using the standard DB-25 connector.

Many PCjr.s also have a Memory Expansion Attachment sidecar, from IBM or a third party company.  These sidecars add at least 128KB of RAM to the system.  Few self-booting programs will recognize more than 128KB of RAM in a PCjr.  The memory expansion's device driver must be loaded in DOS for DOS to report more than 128KB available to programs.    A device driver called JRCONFIG will work with any memory expansion.

If you have a 33W power board in the system unit and use more than two sidecars, you will need the IBM PCjr. Power Attachment sidecar, which provides more power for sidecars.  This sidecar must be inserted before any sidecars it needs to power (closer to the system unit) and has a separate power supply identical to the PCjr. system unit power supply.  They use the same connector.  With a 45W power board, you can use three sidecars comfortably.

Turning the System On :

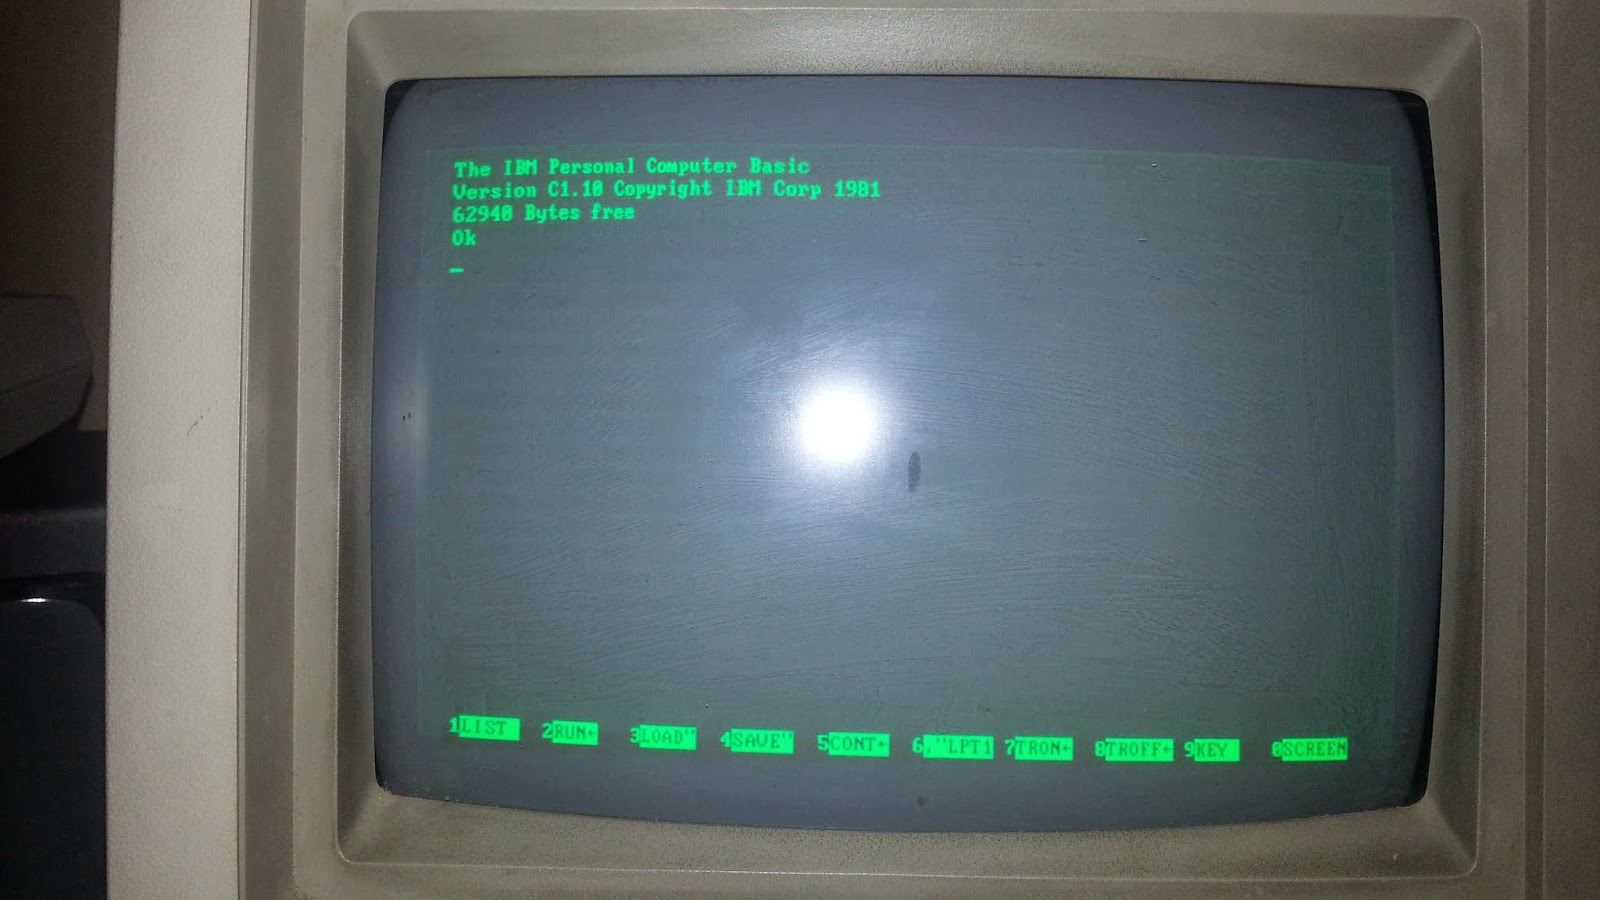
When you turn on the screen, you will immediately see, if the system is working at all, the IBM logo and the fifteen RGBI colors that a CGA monitor can display in addition to black.  The memory will be counted and tested.  Once the memory has been counted, the screen will change to a blinking cursor, the diskette drive will seek and try to boot a disk in the drive.  Any expansions with a bootable ROM, like a hard drive or SCSI expansion interface, will attempt to boot at this time.  If neither the diskette drive nor any bootable interface is available or functioning properly, then the PCjr. will boot a cartridge, and if no cartridge is inserted, then Cassette BASIC.

Fan and Heat :

The fan inside the system blows cool air on the floppy drive and diskette.  IBM felt this was necessary to prevent a disk from melting inside the drive after heavy usage.  The fan is not intended to cool the system, that is what all the vents are for.  You can disconnect the fan without immediate apparent issue if you do not often use the disk drive, but the fan improves airflow inside the case.  This should help the Power Module (the hottest element in the system by far) and the chips underneath the floppy drive (including the CPU).  Although you may be tempted by the prospect of silent operation, leave the fan on.

Keyboard Adventure and System Diagnostics :

The PCjr. has a built-in program called Keyboard Adventure.  This can be loaded by pressing the Esc key just after Cartridge or Cassette BASIC has loaded.  You cannot have pressed any other key before pressing the Esc key.  This program was made to help introduce first-time computer users to the keyboard, and can be used to test the keyboard.  A full description of the program can be found in the PCjr. Guide to Operations manual, which came with every system.  Press Ctrl + Alt + Del to exit and reboot the system.

To start system diagnostics, any time after the PC has booted, whether to BASIC or to a disk, press Ctrl + Alt + Ins.  This will appear to reboot the system, but the memory will be counted and you will be shown a screen with several ASCII graphics and numbers underneath them.   The tests are rather cryptic and are fully explained in the Guide to Operations with the exception of  Test Tags H, I, L, M, N, O & P.  Here are a list of the Test Tags and what they test :

Test Tag 1 - Diskette Drive (requires spare floppy disk)

Test Tag 4 - 40-Column Display modes and 16KB graphics modes

Test Tag 8 - 80-Column Display modes and 32KB graphics modes (requires IBM PCjr. 64KB Memory and Display Expansion Option)

Test Tag 5 - Light Pen

Test Tag 6 - Joysticks

Test Tag 9 - internal PC Speaker and 3-voice sound (external speaker, TV Connector or PCjr. Color Monitor required)

Test Tag J & K - Cordless Keyboard  (Test Tag J treats the keyboard as a 62-key keyboard, Test Tag K treats the keyboard as if it were an IBM PC 83-key keyboard and allows you to use key combinations for the missing keys)

Test Tag G - IBM PCjr. Internal Modem

Test Tag H - IBM PC Compact Printer

Test Tag I - RS-232 (with loopback Plug)

Test Tag L & M - IBM PCjr. Cluster Adapter Attachment

Test Tag N, O & P - IBM PCjr. Speech Adapter Attachment

To escape from any test, press Fn + Break.  Press Ctrl + Alt + Del to exit and reboot the system.

Error Messages :

If you are unfortunate, you may encounter an error message.  Error messages are assigned a letter, here are a list of error messages and possible solutions :

Error A - Memory Problem, remove memory expansion sidecars and internal memory option to try to isolate which one is causing the program.  Will cause the system to hang.

Error B - Keyboard Problem, move the keyboard away from any extremely bright light source, replace the batteries, move the keyboard closer to the system if using IR and do not press any keys during the bootup process.  May cause system to hang.

Error C - Cassette Problem, press Enter to continue booting without using the cassette.  Usually caused when the cassette motor relay goes bad.

Error D - Serial Port Problem, may hang system.  Unplug any device from the serial port.

Error E - Modem Problem, press enter to continue booting without using the Modem.  Make sure the modem is properly inserted.

Error G - Cartridge Problem, may hang system if cartridge is inserted, remove cartridge.

Error H - Diskette Problem, press enter to continue booting without using the Diskette Drive.  Make sure the diskette drive adapter card is properly plugged into the system, the diskette drive is properly connected via the cable to the diskette drive adapter, the diskette drive is plugged into the power connector.

Error X - Unknown, may hang system.  May not actually exist.

Video and Audio Connections :

The PCjr. is very video friendly in that it has a composite video output jack that can connect to almost any modern TV.  You do not need a hard to find CGA compatible monitor to get video output.  The colors may not be as pure, the pixels may not be as distinct, but graphics should be visible.  If you boot to DOS and you see 80-column color fringed text, use the DOS command MODE BW80 to switch the text to black and white.  If you want more legible text, then use MODE BW40 to use a 40-column text mode.

If you find that your PCjr.'s display is off center or partially cut off, press Alt Left Arrow  to shift the visible display to the left and Alt Right Arrow to shift the visible display to the right.  You can also enable or disable the keyboard audio click by pressing Ctrl + Alt + Caps Lock

The internal beeper inside the PCjr system unit will only generate PC Speaker sounds.  If you want to hear sounds from the 3-voice chip, the PCjr. Speech Adapter or from the Cassette Port, you will need to connect the PCjr. to an amplified speaker via the RCA audio output jack, to a TV using the TV Connector switchbox, or to a 4863 PCjr. Color Display.

COM and LPT assignment.

The built in serial port is assigned to COM1 and LPT1 in the BIOS if there is no Internal Modem or Parallel Printer Attachment installed.  However, the resources used by the serial port are I/O 278H and IRQ3, which are generally assigned to COM2.  The Internal Modem uses I/O 3F8 and IRQ4, the BIOS assigns the Modem to COM1 if it is installed and the serial port becomes COM2.  If the Parallel Printer Attachment is installed, it becomes LPT1 and you may need to redirect LPT1 to COM1 or COM2 to print to the serial-based Compact Printer.

Recommended Programs :

Most DOS programs will require a 256KB PCjr., so if you don't have one you are probably going to be limited to self-booting (PC Booter) programs.  King's Quest I & II, The Black Cauldron and Below the Root are excellent adventure games that take advantage of the enhanced graphics and sound features of the PCjr.  Super Boulderdash and Jumpman are solid ports of these classic games with PCjr. features.  Microsoft Flight Simulator 2.0 looks best on the PCjr. and can take advantage of a 256KB PCjr.

The Device Driver JRCONFIG is a must if you are running a 256KB or more PCjr. in DOS.  The PCjr. was released with PC-DOS 2.1, and was officially last supported in PC-DOS 4.0.  DOS 5.0 and above require patching via DEBUG to run on the PCjr.  While DOS 3.3 and below can run in a 128KB PCjr., DOS 4.0 and above are not likely to leave much memory left for programs unless 256KB or more is in the system.

Sunday, February 2, 2014

PCjr. Post-Cancellation, or the Afterlife of a Flop

November 1, 1983 - IBM announced the PCjr. to great fanfare.  Commentators predicted and expected that IBM's new system would bring order and compatibility to the fractured home computer market just as it had the business market with the PC and XT.  Magazines are published geared to the new system and software is updated to support the new features and otherwise run on the PCjr.

March 18, 1985 - IBM announced that it was discontinuing manufacturing the PCjr. system in April, intending to sell the remaining stock at a discount and not release any further peripherals or upgrades for the system.  It would continue to service the machines within their warranty period.

The reasons for the PCjr.'s failure have been well-documented elsewhere.  Had it not been discontinued, it would have probably have been sold until April 1, 1987, when the rest of the PC family was retired to make way for the PS/2 machines.  However, the public apathy for the machine a result of the machine's high price, competition from other home computers, miserable chicklet keyboard, incompatibilities with PC software and the high cost of the upgrades meant that despite IBM's weight in the industry, it had to be withdrawn as it was never going to the all-conquering success IBM intended it to be.

What happens when a buyer, believing in the solid name of IBM, buys a computer whose lifespan had just been reduced from years to months or even days?  Most PCjr.s had been sold during the 1984 Christmas season.  IBM not only abandoned the PCjr, but also soon abandoned its family and entertainment software products.  With one exception, the last games IBM marketed for the PC or PCjr. were released in 1985.  While it tried to put on a brave face by announcing a new and improved successor to the Jr., nothing came of it in the United States.  The closest thing to a PCjr. replacement was the PC JX, essentially the next generation of PCjr. released only in Japan, Australia and New Zealand.  It sold very poorly.  IBM never sold the PCjr. or JX in Europe and Tandy struggled to make an impact there as well.  IBM would not return to the market with a home-friendly machine until the PS/1 in 1990.

When IBM announced the PCjr. was being discontinued, software developers were the first to jump ship.  Microsoft, which had heavily supported the Jr. with the Microsoft Booster sidecar and an updated Flight Simulator 2.0 which took advantage of the Jr.'s capabilities, eliminated its PCjr. development almost overnight.  Spinnaker Software tried to burn its PCjrs in a great bonfire, only to find out that they wouldn't burn!.  Sierra On-line quickly focused its efforts to the PC and the Tandy platform, and many other game companies did the same.  Any software companies who had not yet jumped on the PCjr. bandwagon certainly were not about to start supporting the machine once its discontinuance had been announced.

All PCjr. magazines had already folded by December, 1984, in response to the weak market for the PCjr. before the 1984 Christmas season.  Peter Norton had written a trilogy of how-to books for the PCjr., Discovering the PCjr, Exploring the PCjr and Mastering the PCjr, but the third book was never released due to the discontinuing of the PCjr.

Every game that had support for the PCjr.'s graphics and sound, as identified in an earlier post on this blog, were all self-booting games released in 1984 or 1985.  In 1986, games were more and more beginning to run in DOS and very few advertised PCjr. support.  If a program had a sticker that said something like "IBM PC, XT, AT, Tandy 1000 and 100% Compatibles" that pretty much meant the PCjr. was unsupported and if the game worked it was more by chance than design.  Any DOS games from 1986 or later that did run on the PCjr., with expanded memory, tended to treat it just like an IBM PC with CGA. Sierra Online was the main exception, because its AGI engine had been originally built on the PCjr. and thus it was no great effort to make sure its games continued to run on it.  All Sierra AGI DOS games thus will work on the PCjr., but versions that work are a bit picky, the first versions of Space Quest, Police Quest, and King's Quest IV will not.  So will Thexder, 3-D Helicopter Simulator, later versions of Silpheed but later Game Arts/Falcom ports will not.  Early versions of King's Quest IV, Leisure Suit Larry II and perhaps Police Quest II specifically did not run on the PCjr., but later versions of these SCI engine games and other 16-color SCI0 engine games would run on a PCjr.

For the home user that had almost certainly dropped over $1,000 on the PCjr., it was not so easy to discard the computer like a bad memory as the mainstream industry had done.  Some undoubtedly felt that their purchase was now useless and soon consigned it to the attic or the basement.  Others probably only used it until they could afford something better.  But for some of the owners of the approximately 500,000 PCjrs IBM shipped out of its factories, they were not going to just let the machine gather dust and mildew.

Those who decided to stick with it and make a go with the Jr. were not completely left out in the cold, hardware wise.  The hardware expansion market for the PCjr. had dwindled considerably, but there were companies still trying to fulfill the need for upgrades.  Comapnies like Racore, Legacy and eventually PC Enterprises stepped up to offer an assortment of sidecars, cartridges, peripherals and expansion chassis to expand the capabilities of the comparatively crippled PCjr.  You could obtain a second floppy drive, a hard drive, 640KB of RAM, a clock/calendar chip, replacement keyboards, CPU accelerator boards, a coprocessor upgrade, Hayes compatible modems, and eventually SCSI adapters, VGA and Sound Blaster clones.  They sold compatibility cartridges that would fool software programs into thinking they were running on a PC.  In short, you could upgrade your Peanut almost as much as you could a PC or XT, but you had to do your research and purchase via mail order.  However, these expansions were sold to a limited market and pricey, often pricier than comparative PC expansions.  Also, with the monitor,  sidecars, expansion chassis and many adapters and cables to connect to standard PC peripherals, the PCjr. would eventually begin to look like a big "L" shaped spider.  PC Enterprises was in business the longest, finally closing its doors around the turn of the century.

For software, after 1985 things became really iffy for PCjr. owners.  Most PC game software (except Sierra), either only supported PC CGA, Hercules or EGA graphics and PC Speaker sound, and most of it required 256KB or more.  That software was indifferent to the PCjr. but if DOS-based, often would run if the PCjr had sufficient memory.  All IBM PCs and most clones by 1985 came with 256KB. While the Tandy 1000 also only came with 128KB, it was designed for 640KB, the PCjr. was designed for 128KB. While Tandy's memory expansions were pricey at first, they also added DMA, a widely appreciated feature which was difficult to implement on the PCjr.

For software now supporting Tandy graphics and sound, often the extra effort at trying to support a "dead" computer meant that developers did not bother, even though IBM made half a million PCjr.s and sold 400,000 of them.  Many developers did not have a PCjr. to test with.  Even though the IBM PCjr. and the Tandy 1000 operate almost identically, there are enough differences that making sure that software ran reliably on both was a real headache for a programmer unfamiliar with both systems.  Besides, with DMA, a relocatable video buffer, no extra latency between video and RAM access in the first 128KB, PC compatible floppy I/O addresses, two floppy drive support, easier hard disk support, better keyboard, more standard peripheral ports and faster Tandys, what time-pressed programmer wanted even to test their code on a PCjr.?

Here are some of the issues facing the programmer who wanted to make his software, designed on a Tandy 1000, work on a PCjr. :

Memory Issues - In the IBM PCjr., the first 128KB of memory is governed by the video controller.  This was done to simplify the design, eliminate the need for a DMA controller or separate circuitry to refresh the DRAM.  The video controller would read all the RAM sixty times a second.  However, this came at the expense of performance, as the video circuitry and the CPU had to contend with each other's access to RAM.  Any RAM added via sidecar above 128KB had its own refresh controller and thus accesses to and from this RAM was as fast as a PC.  So in the PCjr. there was a combination of "slow" RAM and "fast" RAM.  Tandy implemented this same feature in its machine, but unlike the PCjr, Tandy made sure that there was no adverse impact on performance.  So there is no "slow" and "fast" distinction in a Tandy, and any programmer desiring a consistent speed for their operations would have this headache.

The addition of memory above 128KB on a PCjr. does not give you as much memory as you would think. Adding more memory requires a DOS memory driver to configure the system to use the memory. Otherwise programs will not recognize or use it (with the rare exception of the Flight Simulator II booter.)  The memory driver will set the free RAM from 128KB upward and leave the slow first 128KB to the Video, BIOS, DOS and may configure the rest as a RAM disk.  A Tandy does not require this and can have more free RAM available to programs because its DOS does not need memory drivers or treat the first 128KB as non-user memory.  Generally speaking, a Tandy without the 768 RAM upgrade will report a maximum of 624KB available to DOS programs while a PCjr. will report 608KB.

Video Issues - Both the Tandy 1000 and IBM PCjr. have a video memory window at B8000 to maintain CGA compatibility.  Until the (upgraded) Tandy 1000 TX, there would be no actual memory in this area, it would redirect to the designated address of the main memory where the video buffer was located. However, IBM only provided a 16KB window at B8000-BBFFF while Tandy allowed access to a 32KB window at B8000-BFFFF.  For the 160x200x16 mode or any of the CGA modes, this made no difference because one screen's worth of these graphics modes use 16KB.  The 320x200x16 and 640x200x4 modes require a 32KB buffer.  On any Tandy 1000, the programmer could use the B8000 window and not have to bother about figuring out where the video buffer really began.  If the programmer made no changes to his code for the PCjr., only every other line would be visible.  This gave rise to the "Tandy-mod" for the PCjr., where a chip would be soldered into the PCjr. to show all the lines.  To support the PCjr., the programmer would have to write directly to the portion of memory which the video circuitry was using when using a 32KB mode.

The IBM PCjr. had a chip called the Video Gate Array (VGA) that controlled the graphics modes in conjunction with the MC6845.  Tandy implemented this VGA, but its implementation was a little different.  The PCjr.'s VGA had an address and data write register at port 3DA, with the write mode switched by a read to port 3DA.  Tandy must have decided this was inefficient, so address writes in its VGA went to port 3DA and data writes to port 3DD.  Any program that writes to the VGA must be aware of this difference.

Moreover, the actual registers that controlled the modes were implemented differently in the Tandy and PCjr.  In the Tandy, to restore compatibility with the PC CGA, Tandy's VGA supports I/O ports 3D8 (Mode Control) and 3D9 (Color Select).  The PCjr. does not implement these ports, and handles all of the Mode Control functions in the VGA internal ports, most important is port 00.  Tandy's VGA does not implement port 00 in its VGA, instead relying mainly on 3D9.  The differences in the VGA ports (and there are others) is another headache for the programmer who wants to directly program the graphics registers.

Floppy Drive Issues - Tandy followed the IBM PC and used addresses 3F0-3F7 to communicate with the Floppy Disk Controller.  The IBM PCjr. uses addresses F0-F7.  While software using DOS or BIOS routines should not care, since using DOS or BIOS takes care of disk transfers, programs accessing the disk controller directly would need to be modified for the PCjr.  Booter programs and copy protection routines, important in the 1980s, frequently accessed the hardware directly to obfuscate the code or to improve performance.  Moreover, the PCjr. had no provision for DMA while every Tandy 1000 had it or could be upgraded to it.  DMA made for faster disk transfers, and timing critical disk functions would be affected by this.

Keyboard Issues - Tandy uses a 90-key keyboard, and its raw scan codes are identical or similar to the 83-key IBM PC keyboard, except for those keys unique to the Tandy keyboard.  The 62-key PCjr. keyboard with its different arrangement uses different scancodes for the keys that exist on the 83-key PC keyboard.  This is typically with the Fn key, and the scancode pair is then translated by the BIOS for the PC scancode. Tandy's keyboard uses IRQ1, like the PC's, while the PCjr's keyboard uses NMI.  All these make for issues with low level keyboard reading routines.

Even with these issues, there was considerable life left in the old Peanut.  It was quite possible to purchase a PCjr. in 1987, often at a heavily discounted price.  IBM provided some support for the Jr. until that time at least.

In the 1980s, there were often users groups created in a geographical area dedicated to a particular home computer.  Perhaps spurred in part by the abandonment of the platform, PCjr. users groups were formed in several parts of the country and operated for many years, some well into the 1990s.  The most famous ones were the Eugene, Oregon PCjr. Users Group and the Metro PCjr. Users Group in the metro-Washington D.C. area.  These groups provided advice, support and meetings where PCjr. owners could trade the latest news and gossip, review hardware and software and try to solve problems.  The groups also had their own Bulletin Board Services (BBSs), where people could post on message boards and download patches and programs.  Newsletters in print and on disk were also a feature of these clubs.

Many issues of one particular newsletter, the jr Newsletter, are available online.  The jr Newsletter ran from June 1986 to at least October 1993.  This newsletter provided tips, fixes and advertising for PCjr. specific peripherals.  IBM's BBS also had PCjr. specific files for a long time.  Some games, sometimes unintentionally, still supported PCjr. graphics and sound or were hacked to do so.  Electronic Arts, for example, included a PCjr. patch for Starflight made by a PCjr. owner who submitted it to the company.

The PCjr.'s life was not totally brought to an abrupt end in March 1985, despite the views of many at the time and since.  Extending the lifespan of the machine required the user to become intimately familiar with this machine's hardware and the software available for it.  It is an important example of how ordinary people, despite mainstream indifference (and often contempt) and market forces which should have condemned the machine into a nearly-forgotten footnote of computing history, allowed a unique computer to achieve some measure of the hoped-for potential intended for the machine in 1983.